a dirty guide to a clean home

Melissa Dilkes Pateras brings humor and practicality to cleaning and organizing, making chores enjoyable. Her guide offers tips for laundry, repairs, and more, blending fun with functionality.

What is a “Dirty Guide to a Clean Home”?

A Dirty Guide to a Clean Home is a comprehensive, humorous guide to organizing, cleaning, and home repairs. Authored by TikTok star Melissa Dilkes Pateras, it offers practical, enjoyable advice for managing laundry, folding fitted sheets, and using tools like caulk guns. The guide emphasizes daily cleaning rituals and sustainable practices, blending fun with functionality. It’s designed for anyone seeking to make their home life easier without the pressure of perfection, proving that cleaning can be both effective and enjoyable.

Why This Guide is Different

Why This Guide is Different is its blend of humor and practicality, making cleaning enjoyable. Melissa’s judgement-free approach emphasizes small daily tasks and eco-friendly hacks, like preferring dryer balls over sheets. Her tips are effective, fun, and sustainable, distinguishing this guide in the cleaning space with a focus on making home maintenance accessible and enjoyable for everyone.

Who is Melissa Dilkes Pateras?

Melissa Dilkes Pateras is a TikTok star and author known for her humorous, no-nonsense approach to cleaning, organizing, and home repairs. She co-wrote A Dirty Guide to a Clean Home with Carla Sosenko, offering practical, judgement-free advice. Melissa’s expertise spans laundry hacks, DIY fixes, and joyful organizing tips, making her a relatable guide for modern homemakers. Her goal is to empower readers to create functional, stress-free spaces without the pressure of perfection.

Cleaning Hacks You Can’t Live Without

Discover essential hacks for a cleaner home, from quick fixes to daily rituals. Learn how to tackle countertops, sinks, and floors with stress-free, time-saving tricks that shine.

Quick Tips for a Filthy House

Transform your filthy house with these quick, actionable tips! Start by tackling one area at a time—clear clutter, wipe surfaces, and sanitize high-touch zones. Use a “one-touch” rule for cleaning to avoid redoing tasks. For deep grime, mix baking soda and vinegar for a natural scrub. Don’t forget hidden areas like light switches and doorknobs. Organize messes into bins, and prioritize what needs immediate attention. With these hacks, even the grimiest spaces can shine in no time. Remember, small steps lead to big changes, and a cleaner home is just a few minutes away!

How to Make Cleaning Enjoyable

Transform cleaning into an enjoyable experience with Melissa’s tips! Turn chores into games, invite friends over for a cleaning party, and blast your favorite tunes. Celebrate small victories, like a spotless kitchen or a tidy closet. Incorporate humor—laugh at the messes and embrace the process. Make it a family affair or a personal challenge to keep things fun. Reward yourself afterward with something you love. By adding entertainment and joy, cleaning becomes a therapeutic ritual that uplifts your home and spirit, making it a breeze to maintain a clean and happy space!

The Importance of Daily Cleaning Rituals

Daily cleaning rituals are the backbone of a stress-free home. By tackling small tasks like washing dishes or putting away toys each day, you prevent clutter and messes from piling up. Melissa emphasizes that these little efforts add up, making larger cleaning tasks manageable. Consistency creates a balanced routine, ensuring your space remains inviting without overwhelming you. Daily rituals also foster a sense of accomplishment and mental clarity, helping you maintain control over your environment. Over time, these habits become second nature, keeping your home clean and your mind at ease.
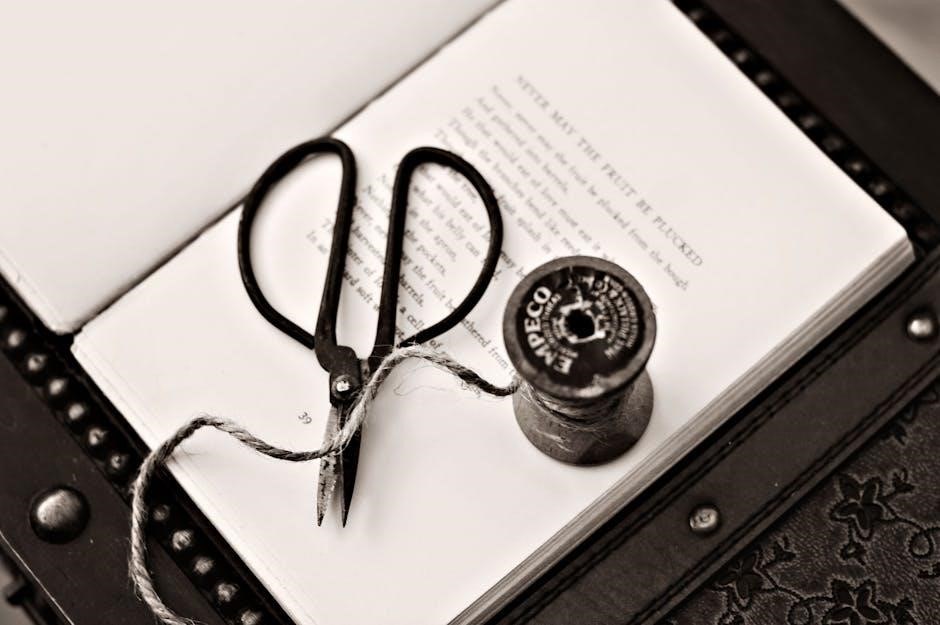
Laundry Essentials

Mastering laundry is key to a clean home. Melissa shares tips on folding fitted sheets, using dryer balls, and making laundry a breeze with humor and efficiency.

Mastering the Art of Laundry

Melissa Dilkes Pateras offers a fresh take on laundry, blending humor with practicality. Her tips range from folding fitted sheets to preferring dryer balls over sheets, making laundry efficient and enjoyable. By breaking down tasks into manageable steps, she transforms a daunting chore into a breeze. Her approach emphasizes daily rituals and clever hacks, ensuring cleaner clothes and less stress. Melissa’s advice is designed to simplify laundry, making it a task you can tackle with confidence and even a smile.

Folding a Fitted Sheet: The Ultimate Hack

Melissa Dilkes Pateras shares her iconic hack for folding fitted sheets, transforming a frustrating task into a breeze. Her method, popularized on TikTok, involves tucking the corners and rolling the sheet neatly. This trick not only saves time but also keeps your linen closet organized. By mastering this simple yet clever technique, you can tackle one of laundry’s most annoying challenges with ease and confidence. Say goodbye to the struggle and hello to perfectly folded fitted sheets every time!

Why Dryer Balls Are Better Than Dryer Sheets

Melissa Dilkes Pateras champions dryer balls as a superior choice to traditional dryer sheets. Unlike single-use sheets, dryer balls are reusable, eco-friendly, and cost-effective. They reduce static cling naturally, soften clothes without chemical residue, and are gentler on fabrics. Plus, they’re better for sensitive skin and the environment. By switching to dryer balls, you can enjoy fresher, cleaner laundry while cutting down on waste. This simple change makes a big difference in both convenience and sustainability, aligning with Melissa’s practical and humorous approach to household hacks.
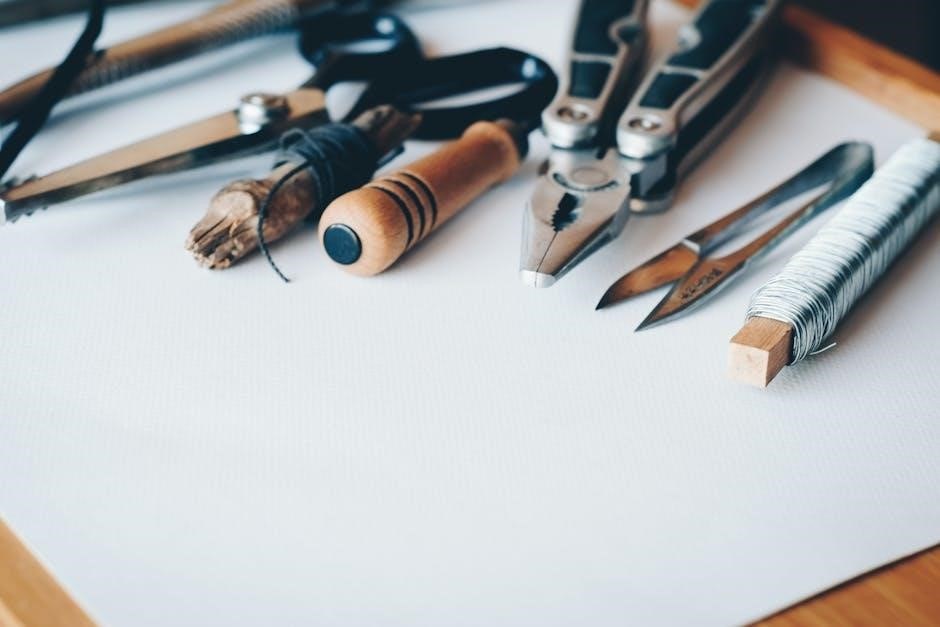
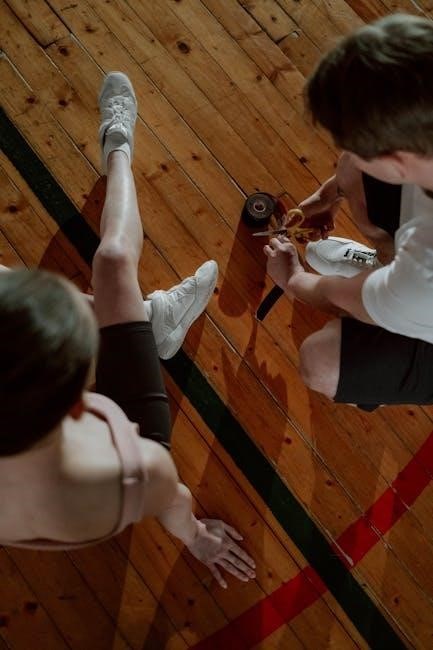
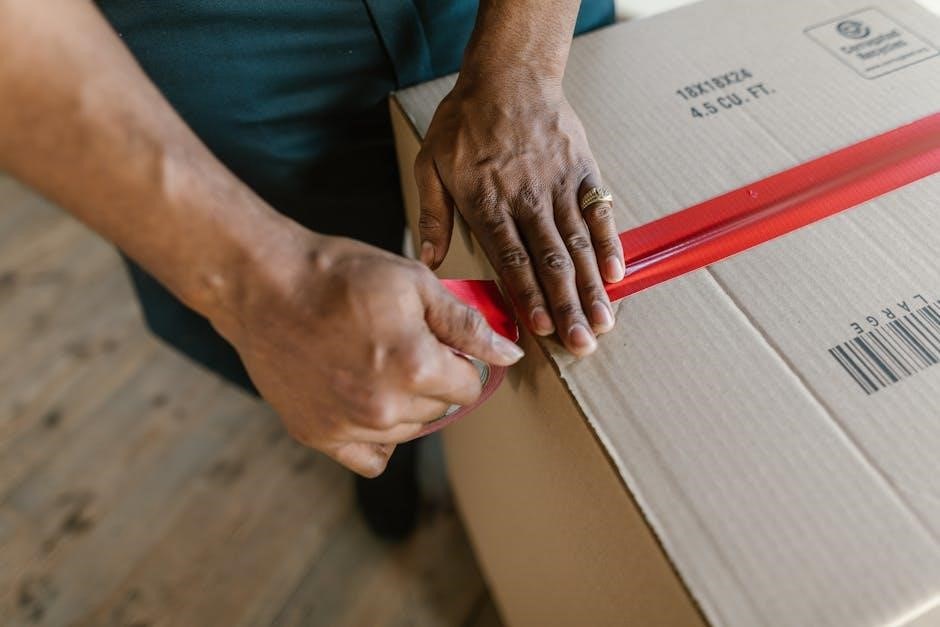
Home Repair Basics

Master essential DIY skills for quick fixes and maintenance. Learn to caulk, patch holes, and tackle small repairs with confidence and humor, saving time and money.

DIY Repairs Everyone Should Know

From patching holes in walls to fixing leaky faucets, DIY repairs are essential for every homeowner. Learn how to use a caulk gun, seal gaps, and handle basic fixes with ease. These simple skills save money and prevent minor issues from becoming major problems. With a few basic tools and some confidence, anyone can tackle these repairs. Melissa Pateras shares her expertise, making DIY accessible and even enjoyable. Her tips and tricks empower you to take control of your home’s maintenance with humor and practicality.

How to Properly Use a Caulk Gun

Mastering the caulk gun is a game-changer for home repairs. Start by cutting the nozzle at a 45-degree angle for precise application. Load the caulk, ensuring it’s seated firmly. Squeeze gently, moving steadily along the gap. Wipe excess with a damp cloth for a clean finish. Avoid overfilling, as it leads to mess. Practice makes perfect—don’t be discouraged by initial mistakes. Melissa Pateras shares tips to make caulking a breeze, transforming it from a chore to a skill. With her guidance, even novices can achieve professional-looking results.

Fixing Holes in Walls and Roofs

Fixing holes in walls and roofs is easier than you think. Start by cleaning the area around the hole to ensure a smooth repair. For small holes, apply spackling compound with a putty knife, sand it down, and paint. Larger holes may require plywood patches or drywall repairs. Melissa Dilkes Pateras shares tips to seal gaps permanently. Use caulk for roof holes and reinforce with waterproofing sealant. Regular inspections can prevent costly damage. With the right tools and techniques, you can fix holes like a pro, keeping your home secure and looking new. Don’t let holes turn into bigger problems—act now!

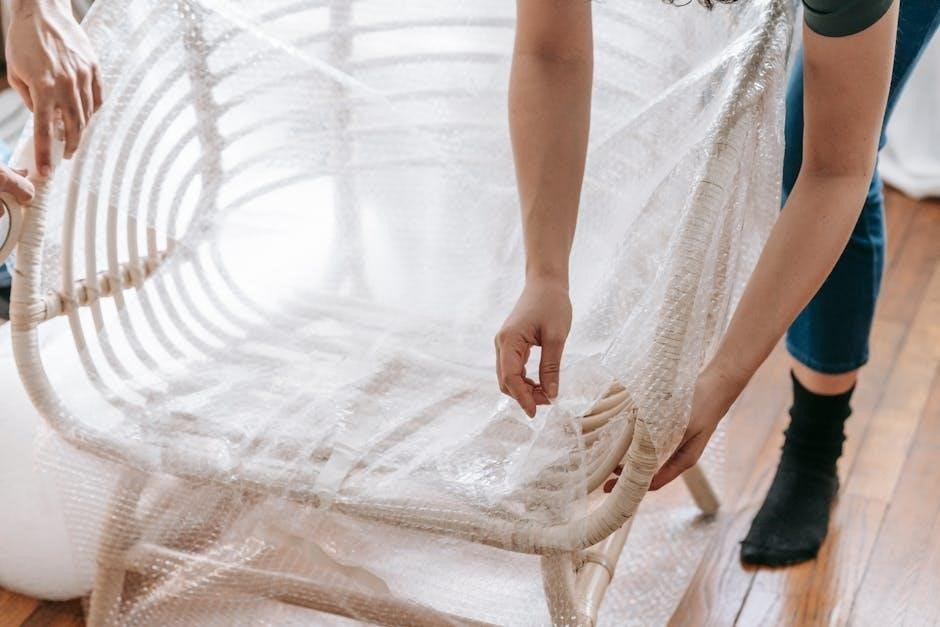
Organizing Your Space

Melissa Dilkes Pateras shares practical tips for organizing your space, from color-coded closets to garage makeovers. Transform chaos into calm with her humorous, no-fuss strategies for a serene home.

The Joy of Color-Coded Closets

Melissa Dilkes Pateras reveals how color-coding transforms closets into serene, organized spaces. This system not only reduces stress but also adds a pop of personality to your wardrobe storage. By categorizing clothes by hue, you can create a visually pleasing arrangement that simplifies outfit planning. Her tips also include practical advice on maximizing storage and maintaining order, proving that a colorful closet isn’t just stylish—it’s functional. With her signature humor, Melissa shows how this small change can bring big joy to your daily routine.

How to Organize Your Garage

Transforming your garage into a functional space starts with maximizing vertical storage and creating designated zones for tools, sports equipment, and seasonal items. Use shelves, hooks, and bins to keep items off the floor and labeled for easy access. A slatwall system can efficiently hang bikes and tools, while an epoxy-coated floor adds durability and ease of cleaning. Designate a central workspace with a vice and proper lighting for DIY projects. Regular maintenance and teaching family members where things go will keep your garage organized and clutter-free, making it a practical and enjoyable area of your home.

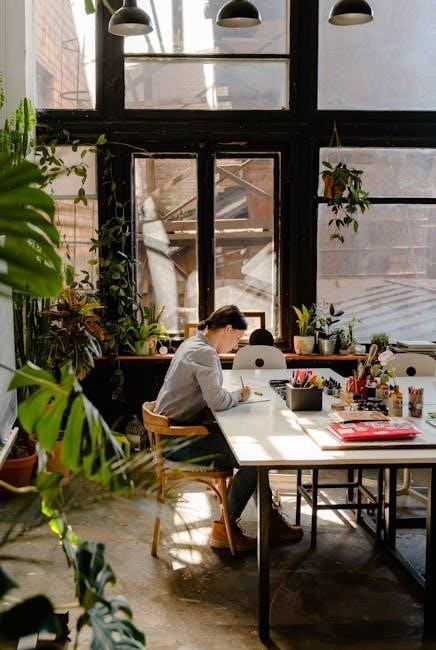
Turning Your Messy Room into a Sanctuary

Transform your chaotic space into a serene retreat by decluttering and organizing. Start by sorting items into keep, donate, and discard piles. Clean thoroughly, dusting, vacuuming, and polishing surfaces. Use soft lighting or candles to create a calming ambiance. Add plants for freshness and visual appeal. Personalize the space with meaningful decor, like photos or artwork. Incorporate cozy textiles, such as throws and rugs, for warmth. By focusing on functionality and aesthetics, you’ll create a peaceful sanctuary that reflects your personality and fosters relaxation, making it your favorite escape from the world.

Cleaning Specific Areas

This section dives into targeted cleaning strategies for key spaces like kitchens and bathrooms. Melissa shares practical tips and humor to tackle tough messes effectively and efficiently.

Cleaning the Kitchen: From Counters to Cabinets

Melissa shares practical tips for transforming your kitchen from chaotic to sparkling. From decluttering countertops to sanitizing sinks, she tackles tough stains and grime with humor. Learn how to deep clean cabinets, organize storage, and maintain a spotless kitchen without losing your mind. Her advice combines efficiency with fun, ensuring your kitchen becomes a space you’ll love spending time in. With Melissa’s guidance, even the most daunting messes become manageable, proving that a clean kitchen is just a few smart hacks away.

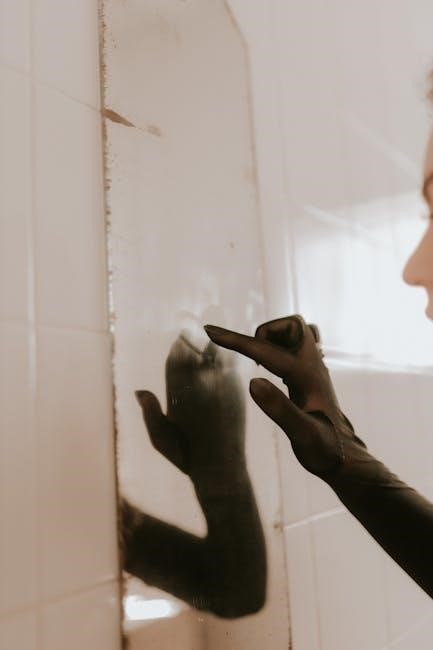
Bathroom Cleaning Hacks

Melissa’s bathroom cleaning hacks turn a dreaded task into a breeze. From tackling soap scum to sanitizing showers, she shares clever solutions with her signature humor. Learn how to use everyday items like vinegar and baking soda for deep cleans, and discover tips for keeping mirrors streak-free. Her approach ensures your bathroom sparkles without endless scrubbing. With Melissa’s advice, even the grimiest grout and toughest tile stains become manageable, making your bathroom a fresh, clean oasis that feels as good as it looks.

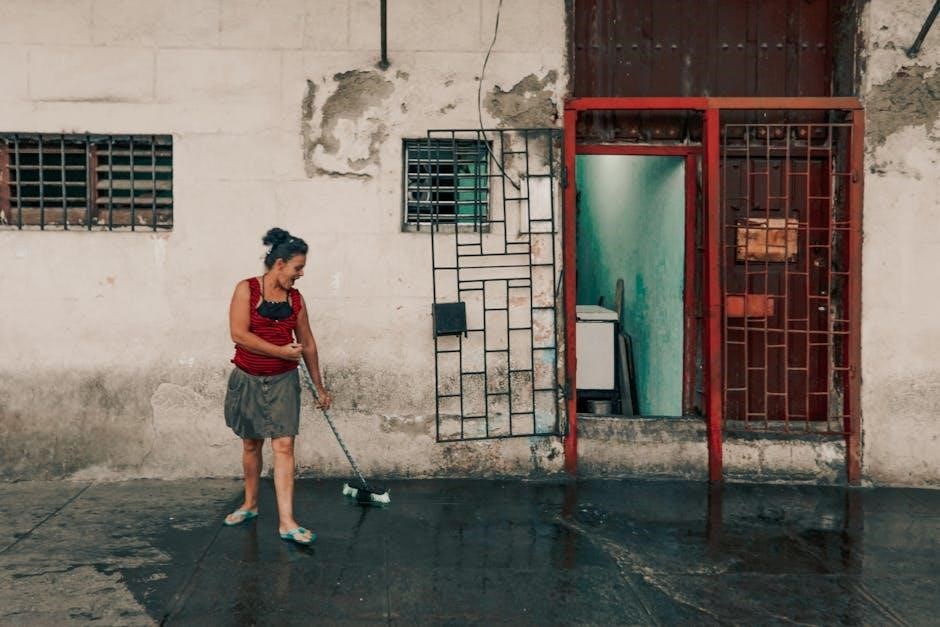
Deep Cleaning Your Floors

Transform your floors from dull to dazzling with Melissa’s deep cleaning hacks. From tile to hardwood, she reveals how to tackle tough stains and grout. Her methods, infused with humor, make the process manageable. Use vinegar and baking soda for natural scrubbing power or steam cleaning for a chemical-free shine. Don’t forget her tip to dry floors thoroughly to prevent water spots. With these tricks, your floors will gleam, becoming the foundation of a clean and inviting home. Say goodbye to dirt and hello to a brighter space with ease!

Creating a Cleaning Routine

Melissa’s approach emphasizes daily tasks for a balanced home. Her routine is about small, manageable steps that make cleaning enjoyable and sustainable, not overwhelming or perfect.

How to Establish a Daily Cleaning Routine

Melissa Dilkes Pateras emphasizes the importance of small, consistent efforts in her guide. Start with manageable tasks like washing dishes immediately or tidying up for 10 minutes daily. Balance is key—cleaning doesn’t have to be perfect. Incorporate humor and hacks to make routines enjoyable. Focus on progress, not perfection, and adapt tasks to fit your lifestyle. Over time, these habits will become second nature, helping you maintain a clean and stress-free home without feeling overwhelmed. Consistency is the foundation of a sustainable cleaning routine.

Seasonal Cleaning Tasks You Shouldn’t Ignore

Melissa Dilkes Pateras highlights the importance of tackling seasonal cleaning tasks to maintain your home’s health and appearance. From deep spring cleaning to winterizing your space, these routines prevent long-term damage and keep your home functional. Regularly inspect and clean gutters, refresh carpets, and prepare your HVAC system for changing weather. Don’t overlook tasks like sealing drafts or organizing seasonal decorations. Melissa’s approach makes these chores manageable and even enjoyable, ensuring your home stays clean and comfortable year-round without overwhelming you.

Maintaining Your Space Without Losing Your Mind

Melissa Dilkes Pateras emphasizes that maintaining your space doesn’t have to be overwhelming. By breaking tasks into small, manageable steps, you can keep your home clean without losing your sanity. Her philosophy revolves around creating a balance between practicality and emotional well-being. Melissa suggests incorporating daily rituals, like quick pick-ups or meal prep, to prevent clutter and chaos. She also stresses the importance of humor and self-compassion, reminding us that imperfection is okay. With her approach, your home becomes a comforting space, not a source of stress.

DIY Cleaning Solutions

Discover eco-friendly, cost-effective cleaning hacks that save money and reduce waste. Melissa shares recipes for natural cleaners, making your home sparkle without harsh chemicals or hefty costs.

Homemade Cleaners That Actually Work

Melissa shares simple, effective recipes for natural cleaning solutions. From all-purpose sprays to scrubbing powders, these DIY cleaners are non-toxic and budget-friendly. Using common household items like baking soda, vinegar, and lemon juice, you can create powerful alternatives to chemical-based products. These solutions are not only eco-friendly but also customizable to tackle specific cleaning challenges. With Melissa’s guidance, you’ll learn how to make your home sparkle without breaking the bank or exposing your family to harsh chemicals. Her formulas are tested, trusted, and surprisingly effective, proving that natural cleaning can be both fun and functional.

Save Money with DIY Cleaning Products

Melissa’s guide highlights how DIY cleaning products can save you money while maintaining a clean home. By using common household items like vinegar, baking soda, and lemon juice, you can create effective cleaners at a fraction of the cost of store-bought alternatives. These recipes are not only budget-friendly but also eco-friendly, reducing waste and exposure to harsh chemicals. With Melissa’s tips, you’ll learn how to make multi-purpose sprays, scrubbing powders, and disinfectants that work as well as, if not better than, commercial products. This approach ensures a cleaner home without breaking the bank.

Natural Alternatives to Chemical Cleaners

Melissa’s guide emphasizes natural alternatives to chemical cleaners, promoting eco-friendly solutions. Vinegar, baking soda, and lemon juice are spotlighted as effective, non-toxic options for cleaning. These ingredients not only reduce exposure to harsh chemicals but also offer a sustainable way to maintain a clean home. By embracing these natural methods, you can create multi-purpose cleaners that are gentle on surfaces and the environment. This approach aligns with Melissa’s philosophy of making cleaning accessible, affordable, and environmentally conscious, ensuring a healthier living space for everyone.

Sustainability in Cleaning

Melissa’s guide highlights sustainable cleaning practices, emphasizing eco-friendly solutions and reducing waste to promote a healthier home and environment through natural alternatives and mindful habits.

Eco-Friendly Cleaning Practices

Melissa’s guide emphasizes eco-friendly cleaning practices that prioritize natural ingredients and sustainability. By using vinegar, baking soda, and essential oils, you can create effective, chemical-free cleaners. Reducing waste by opting for reusable cloths and refillable containers is also encouraged. These methods not only promote a healthier home environment but also contribute to a greener planet. Melissa’s approach makes sustainable cleaning accessible and guilt-free, ensuring your space stays clean without harming the Earth.

Reducing Waste in Your Cleaning Routine

Embrace sustainability by reducing waste in your cleaning routine. Switch to reusable cloths instead of paper towels and opt for refillable cleaning products. Buy in bulk to minimize packaging and avoid single-use items. Repurpose household materials, like turning old t-shirts into cleaning rags. Melissa’s guide encourages eco-conscious choices, such as DIY cleaners using natural ingredients, which reduce chemical waste. By adopting these practices, you’ll not only cut down on waste but also save money and create a more environmentally friendly home. It’s a simple yet impactful way to maintain a clean space while caring for the planet.

The Role of Sustainability in Home Maintenance

Sustainability plays a vital role in home maintenance by promoting eco-conscious practices. By choosing energy-efficient solutions and reducing waste, homeowners can lower their environmental impact. Simple changes, like using natural cleaning products or conserving water, make a difference. Melissa’s guide emphasizes the importance of eco-friendly habits, showing how they not only benefit the planet but also simplify maintenance and save money. These practices create a healthier living space while fostering a sense of environmental stewardship.

Melissa’s guide masterfully blends humor with practical advice, empowering readers to embrace cleaning and maintenance joyfully. It’s a refreshing, sustainable approach to keeping your home clean and life balanced.

Final Thoughts on Cleaning and Home Maintenance

Melissa’s approach emphasizes that cleaning and home maintenance don’t have to be overwhelming. By breaking tasks into manageable steps and adding a dash of humor, she shows how small, consistent efforts can lead to a cleaner, more organized home. Her philosophy centers around making life easier, not achieving perfection. With practical hacks and sustainable practices, she encourages everyone to embrace cleaning as a path to a more joyful and balanced lifestyle, proving that a clean home is achievable without losing your mind.

How to Keep Your Home Clean and Your Sanity Intact

Maintaining a clean home doesn’t mean sacrificing your sanity. Melissa’s approach focuses on small, manageable tasks and humor to keep you grounded. By embracing imperfection and prioritizing what truly matters, you can create a balanced routine that keeps your space tidy without draining your energy. Her tips encourage a mindset shift, proving that cleanliness and calmness go hand in hand. With practical hacks and a dash of wit, she shows how to keep your home clean while keeping your mental well-being intact.

hart 20v weed eater manual

1.1 Overview of the HART 20V Weed Eater

The HART 20V Weed Eater is a cordless string trimmer designed for efficient yard maintenance. It features a pivoting head, 20V battery, and auto-feed functionality for ease of use.

The HART 20V Weed Eater is a lightweight, cordless string trimmer designed for efficient yard maintenance. It features a 20V lithium-ion battery, pivoting head for easy edging, and an ergonomic handle for comfort. The tool is ideal for small to medium yards, offering a balance of power and portability. Its auto-feed head simplifies string management, while the compact design ensures maneuverability. This trimmer is a versatile solution for trimming grass and weeds with minimal effort and maximum efficiency.

1.2 Importance of Reading the Manual

Reading the manual is crucial for understanding the HART 20V Weed Eater’s operation, safety guidelines, and maintenance requirements. It provides detailed instructions on assembly, usage, and troubleshooting, ensuring safe and effective operation. The manual highlights potential safety concerns, proper techniques, and care tips to maximize the tool’s performance and longevity. By following the manual, users can avoid common issues and ensure optimal results while maintaining their yard with ease and confidence.

Safety Precautions

Always wear protective gear, including gloves and safety glasses. Keep loose clothing tied back and avoid operating near bystanders. Be cautious of moving parts and sharp edges.

2.1 General Safety Guidelines

Always read and follow the manual carefully. Wear protective gear, including gloves and safety glasses. Keep loose clothing and long hair tied back. Avoid operating near children or pets. Ensure the area is clear of debris and flammable materials. Maintain a firm grip on the trimmer and avoid overreaching. Never touch hot or moving parts. Use the trimmer only in well-ventilated areas and avoid operating during extreme weather conditions. Follow all safety messages and warnings provided.

2.2 Understanding Safety Labels and Symbols

The HART 20V Weed Eater manual includes safety labels and symbols to alert users to potential hazards. These labels are located on the trimmer and in the manual, highlighting critical safety information. Symbols may indicate rotating parts, hot surfaces, or electrical components; Always read and understand these warnings before use. They are designed to prevent accidents and ensure safe operation of the trimmer. Refer to the manual for detailed explanations of each symbol and label.

2.3 Pre-Operation Checks

Before using the HART 20V Weed Eater, perform a thorough pre-operation check. Ensure the battery is fully charged and securely attached. Inspect the trimmer line for proper length and damage. Check the cutting guard for alignment and wear. Verify all parts are securely tightened. Remove any debris from the trimmer head. Test the trigger and auto-feed function to ensure smooth operation. Always wear safety gear, including gloves and eye protection. Clear the area of obstacles before starting.

Product Features

The HART 20V Weed Eater features a 20V lithium-ion battery, pivoting head for edging, and auto-feed line system. It includes a lightweight design, ergonomic handle, and adjustable length.

3.1 Key Features of the HART 20V Weed Eater

The HART 20V Weed Eater offers a 20V lithium-ion battery for cordless convenience. It features a pivoting trimmer head for easy conversion to an edger, an auto-feed line system, and a lightweight ergonomic design. The trimmer is ideal for small to medium yards, with a balanced build and adjustable length for user comfort. Additional features include a kick-to-edge mechanism and compatibility with optional accessories.

3.2 Technical Specifications

The HART 20V Weed Eater operates on a 20V lithium-ion battery, providing reliable power for trimming tasks. It weighs approximately 7.5 pounds, making it lightweight and easy to maneuver. The trimmer uses 0.080-inch diameter line and features a 13-inch cutting swath for efficient trimming. The adjustable handle and pivoting head allow for precise control, while the auto-feed system ensures continuous operation. The kit includes a 2.0Ah battery and charger for convenient use.

3.3 Included Components

The HART 20V Weed Eater kit includes the trimmer unit, a 2.0Ah lithium-ion battery, a charger, and an operator’s manual. Additional components such as a spool of 0.080-inch trimmer line and a cutting guard are also provided. The package ensures you have everything needed to start trimming right out of the box, with clear instructions for assembly and operation.

Assembly and Setup

Assembly and setup of the HART 20V Weed Eater are straightforward. The trimmer is lightweight with an ergonomic design, making it easy to handle. Follow the step-by-step instructions in the manual for a quick and efficient setup to ensure optimal performance.

4.1 Unpacking and Inventory

When you unbox the HART 20V Weed Eater, carefully inspect the contents to ensure all components are included and undamaged. The package typically contains the trimmer shaft, 13-inch cutting swath, 20V battery, charger, operator’s manual, and additional accessories like the auto-feed head. Take a moment to verify the inventory matches the list provided in the manual. This step ensures you’re fully prepared for assembly and operation, avoiding any delays or missing parts. Properly organize the items to begin the setup process efficiently.

4.2 Step-by-Step Assembly Instructions

Begin by attaching the handle to the trimmer shaft, ensuring a secure fit. Next, align the cutting guard with the shaft and snap it into place. Tighten all connections firmly. Finally, insert the 20V battery into the trimmer’s battery compartment until it clicks. Double-check all parts are properly assembled. The process is straightforward and requires minimal effort. Refer to the manual for detailed visuals and instructions to ensure everything is correctly assembled before use.

4.3 Attaching the Trimmer Head

To attach the trimmer head, align the head with the shaft and snap it into place securely. Ensure the head is tightly locked to prevent loosening during use. If using a cutting guard, mount it firmly to protect against debris. Double-check all connections before operating. Proper attachment ensures optimal performance and safety. Follow the manual’s visual guide for precise alignment and secure fitting of the trimmer head to the shaft.

Operating the Weed Eater

The HART 20V Weed Eater is designed for easy operation, featuring an ergonomic handle and adjustable head for precise trimming and edging. It is ideal for small to medium yards.

5.1 Starting the Trimmer

To start the HART 20V Weed Eater, ensure the battery is fully charged and properly inserted. Press the safety switch and pull the trigger to engage the motor. For continuous operation, hold the trigger firmly. Always wear safety gear and maintain a firm grip for control. If issues arise, refer to the manual for troubleshooting steps. Proper handling ensures safe and efficient trimming. Follow all safety guidelines for optimal performance.

5.2 Adjusting the Trimmer Head for Edging

To adjust the HART 20V Weed Eater for edging, press the lock button and pivot the trimmer head until it aligns vertically. Lock the head in place for precise edge trimming. Ensure the cutting string is at the correct angle to avoid damage. For best results, maintain a steady pace and keep the trimmer parallel to the ground. This feature allows seamless conversion from trimming to edging, enhancing versatility for yard maintenance tasks.

5;3 Using the Auto-Feed Head

The HART 20V Weed Eater features an auto-feed head that automatically releases the cutting string during operation. To use it effectively, ensure the trimmer is turned on and the head is allowed to spin freely. The auto-feed mechanism eliminates the need for manual string adjustment, providing consistent cutting performance. For optimal results, maintain a steady pace and keep the trimmer head at a slight angle to prevent excessive string usage.

Maintenance and Care

Regular maintenance ensures optimal performance and longevity of your HART 20V Weed Eater. Clean the trimmer head and line after each use, and inspect for wear. Store the tool in a dry, cool place, away from direct sunlight. Always follow the manual’s guidelines for proper care and storage to maintain efficiency and safety.

6.1 Cleaning the Trimmer

Regular cleaning is essential for maintaining the performance of your HART 20V Weed Eater. After each use, remove any debris or grass clippings from the trimmer head and line. Use a soft brush or cloth to wipe down the exterior, avoiding harsh chemicals. Inspect the cutting area for blockages and ensure all moving parts are free from obstructions. Refer to the manual for specific cleaning instructions to keep your tool in optimal condition.

6.2 Replacing the Trimmer Line

To replace the trimmer line on your HART 20V Weed Eater, first, ensure the device is powered off and the battery is removed for safety. Locate the spool at the trimmer head, which is typically held in place by a clip or screw. Release the clip or remove the screw to access the spool. Remove the old line and inspect the spool for any remaining debris. Cut a new piece of trimmer line to the recommended length, usually specified in the manual. Wind the new line onto the spool in the correct direction, ensuring it doesn’t overlap or tangle excessively. Reinsert the spool into the trimmer head, securing it with the clip or screw. Finally, test the trimmer to ensure the new line feeds and cuts properly. Always refer to the manual for specific instructions and safety precautions;

6.3 Storing the Trimmer

Proper storage of the HART 20V Weed Eater is essential for maintaining its performance and longevity. After cleaning, remove the battery to prevent drainage and store it separately. Place the trimmer in a dry, cool area away from direct sunlight. Avoid exposing it to extreme temperatures or humidity. Ensure the cutting head is free of debris and the line is not tangled. Regularly inspect for wear or damage before storing for extended periods.

Troubleshooting Common Issues

Troubleshooting helps resolve common problems with the HART 20V Weed Eater, such as startup issues, line feeding, or battery charging. Follow specific guidelines for each concern.

7.1 The Trimmer Will Not Start

If the HART 20V Weed Eater fails to start, ensure the battery is fully charged and properly inserted. Check the safety switch and start mechanism for any blockages. Verify that the power button is functioning correctly. Consult the manual for detailed troubleshooting steps to diagnose and resolve the issue efficiently.

7.2 The Trimmer Line is Not Feeding Properly

If the trimmer line isn’t feeding, check for tangles or knots in the line. Ensure the spool is correctly installed and aligned. If the line is too long, trim it to the recommended length. Clean the cutting guard and trimmer head to remove any debris. Verify that the correct type and diameter of line is used, as specified in the manual. If issues persist, consult the troubleshooting guide or replace the spool or head if damaged.

7.3 The Battery is Not Charging

If the battery isn’t charging, first ensure the charger is properly plugged into a working outlet. Check for damage to the charger or battery contacts and clean them if necessary. Verify that the charger is compatible with the HART 20V battery. Allow the battery to cool if it’s overheated, as this can prevent charging. If issues persist, reset the charger or consult the manual for troubleshooting steps. Contact HART support if the problem remains unresolved.

Battery and Charger Information

This section provides essential details about the HART 20V battery and charger, including safety tips, charging procedures, and storage guidelines to ensure optimal performance and longevity.

8.1 Battery Safety Tips

  • Avoid exposing the battery to extreme temperatures, as this can reduce its lifespan and performance.
  • Always charge the battery on a stable, heat-resistant surface, away from flammable materials.
  • Use only the charger provided by HART to ensure compatibility and safety.
  • Keep the battery dry and avoid submerging it in water to prevent damage.
  • Store the battery in a cool, dry place when not in use for extended periods.
  • Avoid physical stress or puncturing the battery, as this can cause internal damage.

8.2 Charging the Battery

To charge the HART 20V battery, use the provided charger and plug it into a standard 120V outlet. Place the battery on the charger, ensuring it clicks securely into place. Avoid overcharging by monitoring the LED indicator, which turns green when fully charged. Allow the battery to cool slightly before use after charging. Charging typically takes 1-2 hours, depending on the battery’s state. Always follow the manufacturer’s guidelines for optimal performance and safety.

8.4 Battery Storage Guidelines

Store the HART 20V battery in a cool, dry place, away from direct sunlight and moisture. Avoid extreme temperatures to maintain battery health. If not in use for an extended period, charge the battery to 50% capacity before storing. Keep the battery in its original packaging or a protective case to prevent damage. Do not store a fully discharged battery, as this can reduce its lifespan. Regularly inspect the battery for signs of wear or damage before and after storage.

Accessories and Replacement Parts

Accessories like 20V batteries, chargers, and string trimmer heads are available. Replacement parts, such as cutting lines and blades, can be purchased from HART or Walmart.

9.1 Recommended Accessories

Recommended accessories for the HART 20V Weed Eater include a 20V lithium-ion battery, charger, and additional cutting lines. A Grass Guard Line Cut-Off Blade is also available for precise trimming. Consider a pivoting edging kit for enhanced functionality. These accessories ensure optimal performance and versatility for various yard tasks. Always purchase genuine HART parts from authorized dealers to maintain warranty validity and ensure compatibility.

9.2 Where to Buy Replacement Parts

Replacement parts for the HART 20V Weed Eater are available at Walmart, the official HART Tools website, and authorized retailers. Visit the HART Tools website, enter your product model number, and search for support documents or parts. Ensure to purchase genuine HART accessories from reputable sources to maintain compatibility and warranty validity. Online marketplaces like Walmart also offer a variety of compatible accessories for convenient shopping.

9.3 Installing Replacement Parts

For installing replacement parts on your HART 20V Weed Eater, follow the instructions in the operator’s manual. Ensure the tool is powered off and safe to handle. Remove the spool or damaged component, then install the new part securely. Refer to the manual for specific diagrams and torque specifications. Test the trimmer after installation to ensure proper function. If unsure, contact HART customer support for assistance.

Warranty and Support

The HART 20V Weed Eater is backed by a comprehensive warranty covering defects in materials and workmanship. Register your product online for extended support and view warranty details on the official HART website. For assistance, contact HART customer support directly or refer to the provided manual for troubleshooting guidance and repair options. Visit HART Tools for more information.

10.1 Warranty Information

The HART 20V Weed Eater is covered by a comprehensive warranty that ensures protection against manufacturing defects. The warranty period varies depending on the product and usage conditions. To activate the warranty, users must register their product on the official HART website. Proper registration guarantees access to repair or replacement services. For detailed warranty terms, refer to the manual or visit the HART Tools website. Always retain the purchase receipt for warranty validation.

10.2 Contacting HART Customer Support

For assistance with your HART 20V Weed Eater, contact HART Customer Support through their official website or support portal. Visit the HART Tools Support Page for troubleshooting guides, manuals, and repair options. You can also reach their team via phone or email for inquiries or service requests. Ensure to have your product model number ready for efficient support. HART Tools is committed to providing reliable assistance for optimal product performance.

10.3 Online Resources and Manuals

Access comprehensive online resources and manuals for the HART 20V Weed Eater on the official HART Tools website. Download the Operators Manual for models like HGHST01 and HLST01 in PDF format. Find troubleshooting guides, assembly instructions, and safety tips. Additional resources, such as YouTube tutorials for assembly and maintenance, are also available. Use the search feature on HART Tools to find specific support documents for your trimmer model, ensuring optimal performance and safe operation. Online resources provide easy access to all necessary information.

Environmental Considerations

Proper disposal of batteries and recycling old trimmers is crucial. Always follow local guidelines for eco-friendly practices to minimize environmental impact and promote sustainability.

11.1 Proper Disposal of Batteries

Dispose of HART 20V batteries responsibly to protect the environment. Do not discard in regular trash, as they contain hazardous materials. Check local regulations for recycling options or participating retailers. Many communities offer collection events for safe disposal. Always discharge batteries fully and tape terminals to prevent short circuits. Proper disposal helps reduce environmental impact and promotes sustainability.

11.2 Recycling Options for Old Trimmers

Recycle your old HART 20V Weed Eater responsibly. Check local electronics recycling centers or participating retailers that accept cordless tools. Many communities offer collection events for hazardous waste. Remove the battery and dispose of it separately through designated programs. Recyclers often accept the trimmer’s plastic and metal components, reducing landfill waste. Visit HART’s official website or local recycling resources for specific guidelines and drop-off locations to ensure environmentally friendly disposal.

The HART 20V Weed Eater is an efficient, versatile tool for yard maintenance. Regular maintenance and proper care ensure optimal performance and longevity.

12.1 Final Tips for Optimal Performance

To maximize your HART 20V Weed Eater’s efficiency, always maintain the trimmer line at the recommended length and avoid overloading the spool. Regularly clean the trimmer head and ensure the battery is fully charged before use. Store the tool in a dry, cool place to prevent damage. For edging, use the kick-to-edge feature carefully to avoid wear. Sharpen the blade periodically for consistent cutting performance.

12.2 Staying Safe While Using the Trimmer

Always wear safety goggles and gloves to protect yourself from debris. Keep loose clothing tied back and avoid wearing jewelry that could get caught. Maintain a firm grip on the handle and avoid overreaching, ensuring proper balance. Keep children and pets away while operating. Be cautious of the rotating head and never touch it during use. Regularly inspect the trimmer for damage and ensure all safety guards are in place. Follow all warnings in the manual to ensure safe operation.

knife guide

Knives are indispensable tools in every kitchen, offering precision and versatility for various cutting tasks. From chopping vegetables to slicing meat, a good knife enhances cooking efficiency and creativity, making it an essential instrument for both professional chefs and home cooks. Understanding the right knife for the job can elevate your culinary skills and transform everyday cooking into a enjoyable experience.

Types of Knives

From chef’s knives to paring, serrated, utility, and bread knives, each type is designed for specific tasks, ensuring precision and efficiency in various culinary applications.

Chef’s Knife

The Chef’s Knife, also known as a cook’s knife, is an essential tool for any kitchen. Its versatility allows for chopping, slicing, and mincing ingredients with precision. The blade typically ranges from 6 to 12 inches, with a curved edge that enables a rocking motion for efficient cutting. Often crafted from high-carbon steel or stainless steel, it offers durability and resistance to corrosion. Regular sharpening and proper care ensure its longevity and performance, making it a worthwhile investment for home cooks and professional chefs alike.

Paring Knife

A paring knife is a small, versatile tool essential for precision cutting. Typically 2 to 4 inches long, it excels at peeling fruits, coring vegetables, and trimming small items. Its compact size allows for precise control, making it ideal for detailed work. Often crafted from high-carbon steel or stainless steel, it ensures durability and sharpness. The ergonomic handle provides comfort during extended use. A must-have for both professional chefs and home cooks, the paring knife is a cornerstone in any kitchen setup.

Serrated Knife

A serrated knife features a saw-like edge, designed for cutting through tough or fibrous materials. Ideal for slicing bread, tomatoes, and meat, its teeth-like blades prevent tearing and ensure clean cuts. Typically 8 to 10 inches long, it is a must-have for any kitchen. The serrated edge requires less sharpening but benefits from occasional honing. Durable materials like high-carbon steel or stainless steel ensure longevity; Its versatility makes it a go-to tool for both everyday use and special culinary tasks.

Utility Knife

The utility knife, typically 4 to 7 inches long, is a versatile tool designed for various kitchen tasks. Its straight or serrated edge excels at slicing, chopping, and trimming ingredients like vegetables, meat, and herbs. Made from durable materials such as high-carbon steel or stainless steel, it combines strength and flexibility. The ergonomic handle provides comfort and control, making it ideal for both professional chefs and home cooks. A utility knife bridges the gap between a paring knife and a chef’s knife, offering precision and adaptability in the kitchen.

Bread Knife

The bread knife, typically 8 to 10 inches long, features a long, serrated blade designed for cleanly slicing bread without crushing it. Its sharp, toothed edge effortlessly saws through crusty loaves and soft pastries alike. Made from durable materials like stainless steel or high-carbon steel, this knife ensures even cuts and minimizes tearing. Ideal for both homemade and store-bought bread, the bread knife is a versatile tool that also works well for cutting soft fruits and cakes, making it a must-have in every kitchen.

Blade Materials

Blade materials like high-carbon steel, stainless steel, Damascus steel, and ceramic offer distinct durability, edge retention, and rust resistance, ensuring optimal performance for various kitchen tasks and preferences.

High-Carbon Steel

High-carbon steel is a popular choice for knife blades due to its exceptional durability and edge retention. It is highly prized by professionals for its ability to hold a sharp edge and resist wear. Knives made from high-carbon steel are easy to sharpen and maintain, making them ideal for heavy-duty tasks. However, they can be prone to rust if not properly cared for, requiring regular maintenance to preserve their quality and performance over time.

Stainless Steel

Stainless steel knives are renowned for their corrosion resistance and durability, making them a practical choice for everyday use. They are less likely to rust compared to high-carbon steel and require minimal maintenance. While they may not hold an edge as sharply, stainless steel knives are ideal for home cooks who prioritize ease of care and longevity. Their balanced performance makes them a versatile option for various kitchen tasks, ensuring reliability and consistency in cutting and slicing applications.

Damascus Steel

Damascus steel knives are prized for their distinctive wavy patterns and exceptional durability. Made from layered steel alloys, they offer superior edge retention and resistance to wear. The unique forging process creates a strong, flexible blade with a striking aesthetic. Damascus steel knives are highly valued by both professional chefs and collectors, combining functionality with beauty; They require proper care to maintain their performance but are a worthwhile investment for those seeking a high-quality, visually appealing knife.

Ceramic

Ceramic knives are renowned for their ultra-sharp edges and rust-resistant properties. Made from advanced zirconium oxide, they stay sharper longer and are lightweight for effortless cutting. Ceramic blades are ideal for precision tasks, like slicing vegetables or filleting fish. They are also non-reactive, preserving food flavors. However, they can chip if dropped and require careful handling. Ceramic knives are a great choice for those seeking a durable, low-maintenance option for everyday kitchen use.

Knife Anatomy

A knife’s anatomy includes the edge, spine, tang, handle, and bolster. These components work together to ensure balance, control, and precise cutting, enhancing overall performance and comfort.

Edge

The edge of a knife is the cutting part of the blade, designed for specific tasks. It can be straight, serrated, or a combination, each suited for different cutting techniques. A sharp edge ensures precision and efficiency, while a dull one can be unsafe. Regular sharpening and honing are essential to maintain the edge’s effectiveness. The edge’s angle and material greatly influence its performance, making it a critical feature in determining a knife’s overall utility and longevity in the kitchen.

Spine

The spine is the thick, unsharpened back of the knife blade, running along its length. It provides strength and stability, preventing the blade from bending under pressure. The spine also helps balance the knife, making it comfortable to handle. In some knives, the spine is designed for tasks like cracking bones or opening shells, adding functionality beyond cutting. A sturdy spine is essential for durability, ensuring the knife withstands heavy use and maintains its shape over time.

Tang

The tang is the part of the blade that extends into the knife’s handle, providing structural integrity and balance. It can be partial, extending partway, or full, running the entire length of the handle. A full tang generally offers greater strength and durability, making the knife less prone to breaking. The tang also contributes to the knife’s overall weight distribution, enhancing control during use. A well-designed tang ensures a secure and comfortable grip, essential for precise cutting and handling.

Handle

The handle is a crucial component of a knife, providing grip and control. It is typically made from materials such as wood, metal, or synthetic polymers, ensuring durability and comfort. Ergonomic design is key, with contours that fit the hand naturally, reducing fatigue during extended use. A secure handle allows for precise movements, making it easier to perform intricate cuts. The material and design of the handle significantly impact the knife’s overall balance and usability, enhancing the cooking experience.

Bolster

The bolster is a metal or synthetic component located at the junction of the blade and handle. It serves as a balance point, enhancing the knife’s stability and weight distribution. The bolster also acts as a guard, preventing hands from slipping onto the blade during use. This feature is particularly important for safety, especially during precise or forceful cutting tasks. A well-designed bolster contributes to the knife’s overall ergonomics and functionality, making it a vital element in both form and function.

Maintenance and Sharpening

Regular sharpening and proper cleaning are essential for maintaining knife performance. Use sharpening stones or electric sharpeners to keep edges sharp, and store knives in a dry place to prevent rust and ensure safety;

Sharpening Techniques

Sharpening techniques involve using whetstones, electric sharpeners, or steel rods to maintain a knife’s edge. Start with coarse grit for dull blades, then refine with finer grit for precision. Hold the knife at a 20-degree angle, dragging the blade from heel to tip. Consistency in angle and pressure ensures an even edge. Regular honing with a steel rod maintains sharpness between sharpening sessions, keeping knives in optimal condition for precise cuts and safe handling.

Honing

Honing is a maintenance technique that realigns the knife’s edge, maintaining sharpness without removing metal. Using a honing steel, glide the blade from base to tip at a 20-degree angle, repeating on both sides. This method corrects minor dulling and prevents edge degradation, ensuring precise cuts. Regular honing extends the knife’s sharpness, reducing the need for frequent sharpening. It is essential for maintaining knife performance and safety in the kitchen, keeping edges keen and reliable for various cutting tasks.

Cutting Techniques

Cutting techniques are essential for achieving precision and consistency in the kitchen. Proper methods transform tasks into enjoyable moments, ensuring safety and efficiency while preparing ingredients for any dish.

Julienne Cut

The julienne cut involves slicing ingredients into long, thin strips, typically 1/8 inch thick. It’s ideal for creating uniform shapes for salads, stir-fries, and garnishes. To achieve this, trim the ends of vegetables like carrots or zucchini, slice them into thin planks, and then cut these into strips. This technique ensures even cooking and a visually appealing presentation, making it a versatile skill for various culinary applications.

Dice

Dicing involves cutting ingredients into small, uniform cubes, typically 1/4 inch in size. This technique ensures even cooking and a balanced texture in dishes. To dice, slice the ingredient into thin slabs, stack them, and cut into strips before cubing. Uniformity is key for consistent flavor and presentation. Mastery of dicing enhances knife skills and is essential for preparing a variety of culinary dishes, from soups to salads and stir-fries.

Chop

Chopping is a fundamental knife technique that involves cutting ingredients into smaller, irregular pieces. It’s ideal for ingredients like onions, garlic, and herbs. To chop, place the ingredient on the cutting board, hold the knife firmly, and bring the blade down in a controlled, rocking motion. Keep the tip of the knife on the board for stability. Chopping ensures even distribution of flavors and textures in dishes, making it a essential skill for preparing a wide range of recipes.

Slice

Slicing involves cutting ingredients into thin, uniform pieces, often for presentations or even cooking. To slice effectively, hold the knife at a slight angle and use a smooth, even stroke. For meats, slice against the grain for tenderness. A sharp knife is crucial for clean, precise slices. This technique is essential for preparing ingredients like meats, cheeses, and vegetables, ensuring consistency in texture and appearance. Practice makes perfect in achieving evenly sized slices for professional-looking dishes.

Safety Tips

Always cut away from your body and use a stable cutting surface. Keep fingers curled and away from the blade edge to prevent accidents and injuries.

Handling

Proper knife handling is essential for safety and efficiency. Always grip the knife firmly, with a controlled yet gentle touch, ensuring fingers are curled away from the blade. Avoid placing hands near the cutting edge and never hold ingredients with the blade. Keep your eyes on the task and maintain a stable cutting surface. Store knives in a secure place to prevent accidents and injuries.

Storage

Proper knife storage is crucial for maintaining sharpness and safety. Use a knife block, magnetic strip, or protective sheath to store knives separately. Avoid storing them in drawers without protection, as this can cause damage or injury. Keep knives away from children and moisture to prevent rust. Regularly clean and dry knives before storage to maintain their condition. A well-organized storage system ensures longevity and readiness for use, while also reducing the risk of accidents in the kitchen.

Buying Guide

When purchasing knives, prioritize quality and fit. Consider blade material, handle comfort, and balance. Start with essential knives like chef, paring, and bread knives. Balance budget with durability for long-term value.

What to Look For

When selecting a knife, consider blade material, such as high-carbon steel for sharpness or stainless steel for durability. Handle material should be comfortable and durable, like wood or synthetic. A full tang enhances balance and strength. Look for a bolster for added grip safety. Ergonomics and weight distribution are crucial for comfort. Sharpness and edge retention are key, with a recommended 20-degree sharpening angle. Finally, choose reputable brands known for quality and craftsmanship to ensure long-term performance and value.

Budget Considerations

Setting a budget is crucial when selecting knives. Entry-level knives can be affordable and functional, while high-end options offer superior quality and durability. Mid-range knives often provide the best value, balancing performance and cost. Consider your cooking frequency and skill level to avoid overspending. While premium materials like Damascus steel are tempting, they may not be necessary for casual use. Allocate your budget wisely, prioritizing essential knives over specialty ones to build a practical collection that meets your needs.

Recommended Brands

When choosing knives, consider reputable brands known for quality and durability. Shun, Wüsthof, and Zwilling J.A. Henckels are top choices for premium options, offering exceptional craftsmanship. Victorinox, known for its Swiss Army Knives, provides reliable, budget-friendly alternatives. For Japanese-style knives, Misono and Miyabi are excellent picks. Bobby Flay’s signature knives also offer great value and performance. Investing in trusted brands ensures long-lasting performance and satisfaction, making them worthwhile additions to your kitchen arsenal.

Specialized Knives

Specialized knives are designed for specific tasks, offering precision and efficiency. Hunting knives, fillet knives, cleavers, and pocket knives cater to unique needs, enhancing functionality and versatility in various applications.

Hunting Knife

A hunting knife is a sturdy, versatile tool designed for field dressing, skinning, and preparing game. Its robust blade typically features a straight or recurve edge for precise cuts. Often crafted with high-carbon steel for superior edge retention, hunting knives prioritize durability and ease of sharpening. Ergonomic handles ensure a secure grip, even in wet conditions. Whether for camping or professional use, a hunting knife balances functionality and portability, making it an indispensable companion for outdoor enthusiasts and hunters alike.

Fillet Knife

A fillet knife is specifically designed for filleting fish and other delicate meats, featuring a long, slender blade with flexibility for precise cuts. Its sharp, beveled edge allows for smooth, even slices, while the rounded tip prevents accidental punctures. Typically lightweight with ergonomic handles, fillet knives are ideal for both professional and home use, ensuring clean separation of meat from bones and skin. Regular sharpening maintains its effectiveness, making it a vital tool for seafood preparation and cooking enthusiasts.

Cleaver

A cleaver is a heavy-duty knife with a broad, thick blade, designed for chopping through bones, meat, and tough vegetables. Its broadhead allows for powerful strikes, making it ideal for breaking down large cuts of meat or crushing ingredients like garlic. The cleaver’s weight and balance provide leverage, ensuring clean, efficient cuts. With an ergonomic handle for comfort and control, it’s a versatile tool for both professional chefs and home cooks, perfect for tasks that require brute force and precision.

Pocket Knife

A pocket knife is a compact, portable tool designed for everyday carry. With a folding blade, it offers convenience and safety, fitting easily into a pocket or bag. Its small size makes it ideal for tasks like cutting rope, opening packages, or trimming materials. Available in various designs, from classic to modern, pocket knives often feature multiple blades or additional tools like bottle openers or screwdrivers. They are practical companions for outdoor enthusiasts, professionals, and anyone needing a handy utility knife on the go.

Ergonomics and Comfort

Ergonomics and comfort are crucial for a knife’s usability, reducing fatigue and enhancing precision. Handles made from materials like wood, metal, or synthetic polymers are designed to fit naturally in the hand. A well-balanced knife with a comfortable grip ensures better control and safety. Features like rounded edges and a contoured design minimize strain, while a sturdy bolster provides additional support; A knife that feels right in your hand can elevate your cooking or outdoor experience, making every task more enjoyable and efficient.

pegs term dates 2024 victoria pdf

The 2024 term dates in Victoria serve as a roadmap for the academic year, shaping the learning environment and providing essential planning tools for students, families, and educators.

2024 Term Dates Overview

The 2024 term dates in Victoria provide a clear structure, with four terms and key events, ensuring students, families, and staff can plan effectively throughout the academic year.

Term 1 Dates

Term 1 of 2024 in Victoria begins on January 29 and ends on April 12, spanning 11 weeks. Key dates include Staff Conference Days on January 24-25 and public holidays like Australia Day on January 26, detailed in the Pegs Term Dates PDF.

Term 2 Dates

Term 2 in 2024 commences on April 16 and concludes on June 28, offering a 10-week academic period. Key dates include April 16 as the start date and June 3 as a significant midpoint. The term aligns with public holidays and staff planning days, ensuring a structured schedule. Families and students can refer to the Pegs Term Dates 2024 Victoria PDF for detailed breakdowns of events and breaks. This term is crucial for progressing curriculum goals and preparing for mid-year assessments. The PDF document provides clarity on term-specific activities, ensuring everyone stays informed and organized; Proper planning is essential to maximize the academic benefits of this period.

Term 3 Dates

Term 3 in 2024 begins on July 16 and concludes on September 20, spanning 10 weeks. Key dates include a Staff Conference Day on July 15, followed by the term commencement on July 16. This term is strategically aligned with public holidays and essential academic milestones. Families and students can access detailed schedules through the Pegs Term Dates 2024 Victoria PDF, ensuring clarity on important events and breaks. Term 3 is vital for advancing learning objectives and preparing for final assessments. The structured timeline supports effective planning, enabling students and educators to stay organized. By referencing the PDF, stakeholders can efficiently track key activities and deadlines, fostering a productive academic environment. Proper utilization of these dates ensures a smooth transition into the final term of the year.

Term 4 Dates

Term 4 in 2024 commences on October 7 and concludes on December 13, comprising 11 weeks of academic engagement. Key dates include a Staff Conference Day on October 4, followed by the term’s commencement on October 7. This term is crucial as it leads to the final assessments and the end of the academic year. The Pegs Term Dates 2024 Victoria PDF provides a detailed breakdown of important events, public holidays, and academic milestones for Term 4. Families and students can rely on this document to plan effectively for exams, projects, and extracurricular activities. The structured timeline ensures a smooth transition into the holiday period, making it essential for maintaining organization and focus during the final stretch of the year.

Key Dates and Events

Important events include staff conference days, public holidays, and term conclusion dates, ensuring a structured academic calendar for students, families, and educators to plan effectively.

Staff Conference Days

The 2024 term dates in Victoria include designated Staff Conference Days, which are crucial for professional development and planning. These days typically occur before the commencement of each term, allowing educators to prepare for the upcoming academic period. For instance, Staff Conference Days are scheduled on January 24 and 25, aligning with the start of Term 1 on January 29. Similarly, a Staff Conference Day is set for July 15, marking the beginning of Term 3 on July 16. These days ensure that staff are well-aligned with curriculum goals and school priorities, fostering a collaborative environment. By scheduling these conferences, the school supports continuous improvement in teaching practices and student outcomes, ensuring a strong foundation for the academic year.

Public Holidays

Public holidays play a significant role in shaping the 2024 term dates in Victoria, ensuring breaks for students, staff, and families. Key public holidays include Australia Day on January 26, ANZAC Day on April 25, Queen’s Birthday on June 10, and Christmas Day on December 25. These dates are carefully integrated into the academic calendar to provide well-timed breaks, maintaining a balanced learning environment. Schools remain closed on these days, allowing the community to observe national traditions and spend time together. The alignment of public holidays with term schedules ensures continuity in education while respecting cultural and national significance. These breaks are essential for rejuvenation and preparation for upcoming terms, benefiting both students and staff alike. By incorporating public holidays, the 2024 term dates reflect a harmonious blend of academic and cultural considerations.

Term Conclusion Dates

The conclusion dates for each term in the 2024 PEGS Victoria academic calendar are crucial for planning. Term 1 concludes on March 28, 2024, providing a short break before Term 2 begins. Term 2 ends on June 21, 2024, aligning with the start of the winter break. Term 3 finishes on September 20, 2024, marking the end of the third quarter of the academic year. Finally, Term 4 concludes on December 13, 2024, signaling the start of the Christmas and New Year break. These dates ensure a structured academic year, allowing students, teachers, and families to plan effectively. The conclusion of each term also provides an opportunity to reflect on progress and prepare for the upcoming term. These dates are essential for maintaining continuity in education and align with the standard Victorian school calendar.

Importance of Term Dates

Term dates are essential for organizing academic schedules, ensuring alignment among students, teachers, and families, and maintaining educational continuity throughout the year.

Impact on Academic Planning

Term dates play a crucial role in structuring the academic year, enabling schools to plan lessons, assessments, and extracurricular activities effectively. By providing clear start and end dates for each term, educators can align curriculum delivery with available timeframes, ensuring comprehensive coverage of syllabus content. Students benefit from knowing key milestones, such as exam periods and project deadlines, which helps them manage their workload and prepare adequately. Additionally, term dates facilitate the organization of school events, sports, and enrichment programs, fostering a balanced educational experience. The predictability of term schedules also allows families to plan vacations and personal commitments without disrupting their children’s learning. Overall, term dates are fundamental to maintaining educational continuity and ensuring a smooth, organized academic environment for all stakeholders.

Role in Student Organization

Term dates provide students with a clear framework for organizing their academic and personal responsibilities. By knowing the start and end dates of each term, students can effectively plan their study schedules, assignments, and exam preparations. This structured timeline helps students prioritize tasks, set realistic goals, and avoid last-minute pressures. Additionally, term dates enable students to balance academic commitments with extracurricular activities, sports, and social engagements. The predictability of term schedules also allows students to plan holidays, part-time jobs, or volunteer work without conflicting with school obligations. Overall, term dates empower students to manage their time efficiently, fostering independence, responsibility, and a sense of control over their educational journey. This organization is key to achieving academic success and maintaining a healthy work-life balance.

Significance for School Administration

Term dates are crucial for effective school administration, ensuring seamless planning and organization of the academic year. They provide a clear timeline for scheduling classes, events, and staff duties, enabling administrators to allocate resources efficiently. By adhering to fixed term dates, schools can coordinate staff professional development, meetings, and holidays, maintaining operational consistency. These dates also facilitate budget planning, as they help determine staffing needs, facility usage, and resource allocation. Additionally, term dates allow schools to communicate important deadlines and events to parents and students, fostering transparency and collaboration. Overall, term dates are essential for maintaining order, efficiency, and alignment with educational goals, ensuring the school community operates cohesively and effectively throughout the year.

Accessing Term Dates 2024

Access the 2024 term dates for PEGS Victoria via the official website or downloadable PDF, ensuring easy reference and planning throughout the academic year.

Downloading the PDF

Downloading the 2024 PEGS Victoria term dates PDF is a straightforward process. Visit the official PEGS website and navigate to the calendar or downloads section. Locate the term dates document, which is typically available in PDF format for easy access. Once downloaded, the PDF provides a comprehensive overview of all important dates, including term start and end dates, staff conference days, and public holidays. This format ensures that you can easily save, print, or share the document as needed. The PDF is designed to be user-friendly, with clear sections and dates organized chronologically. By downloading the PDF, you can refer to the term dates anytime, making it an essential resource for planning and staying organized throughout the academic year. This convenient option eliminates the need for constant internet access, ensuring accessibility at all times.

Benefits of Digital Access

Digital access to the 2024 PEGS Victoria term dates offers unparalleled convenience and flexibility. With a digital copy, you can easily access the document from any device, ensuring that important dates are always at your fingertips. The PDF format allows for seamless sharing and printing, making it ideal for families and educators to stay organized. Digital access also reduces the need for physical storage, saving space and minimizing clutter. Additionally, digital files can be quickly searched, enabling users to find specific dates or events efficiently. This modern approach aligns with environmental sustainability goals by reducing paper usage. The ability to access the term dates digitally ensures that everyone stays informed and up-to-date, regardless of location or time. This convenience is particularly beneficial for busy schedules, providing a reliable and accessible planning resource throughout the year.

Understanding the PDF Format

The PDF format ensures consistent and reliable document viewing across all devices, maintaining original layout, fonts, and visuals. It offers security, easy sharing, and universal compatibility, making it ideal for official documents like term dates.

Structure of the Document

The PDF document for Pegs Term Dates 2024 Victoria is organized into clear sections, ensuring easy navigation. It begins with an introduction, followed by term-specific details, including start and end dates, public holidays, and staff conference days. Each term is outlined with specific dates, providing a comprehensive overview. The document also includes a conclusion and references for further information. Visual elements like tables or calendars may be included to enhance readability. This structured format allows users to quickly locate relevant information, making it a user-friendly resource for academic planning.

Navigating the PDF

Navigating the Pegs Term Dates 2024 Victoria PDF is straightforward, with features designed for easy access to information. The document includes bookmarks and a table of contents, allowing users to jump to specific sections quickly. A built-in search function enables users to find dates or events by keyword. Hyperlinks may be included for quick access to related resources or websites. The PDF is also bookmarked by term, making it easy to locate dates for each academic period. Additionally, the document may include an index or overview page for quick reference. Visual cues, such as color-coded sections or bold headings, enhance readability. These features ensure that users can efficiently navigate and find the information they need without hassle.

Frequently Asked Questions

Common queries about the Pegs Term Dates 2024 Victoria PDF include how to download, print, and access the document across various devices.

How to Print the PDF

To print the Pegs Term Dates 2024 Victoria PDF, open the document using a PDF reader like Adobe Acrobat; Click the print button or press Ctrl+P (Windows) or Cmd+P (Mac). Select your preferred printer and adjust settings as needed; Ensure the printer is connected and has sufficient paper. For best results, print in portrait orientation. If printing to PDF, choose “Save as PDF” in the printer options. This method ensures a clear and formatted hard copy of the term dates for easy reference. The process is compatible with most devices and operating systems, making it accessible for all users.

Updating Term Dates

Term dates for Pegs Victoria in 2024 may be updated periodically to reflect changes in the academic calendar. To ensure accuracy, users are advised to check the official Pegs Victoria website or contact the school administration directly. Updates are typically communicated through newsletters, emails, or the school’s digital platform. The PDF document is also updated and reposted online to reflect any changes, ensuring that stakeholders have access to the most current information. It is recommended to verify the dates regularly, especially before key events or term commencements, to stay informed about any adjustments. This proactive approach helps maintain alignment with the school’s schedule and supports effective planning for students, parents, and staff alike.

Compatibility with Devices

The Pegs Term Dates 2024 Victoria PDF is designed to be compatible with a wide range of devices, ensuring accessibility for all users. Whether you prefer to view the document on a desktop, tablet, or smartphone, the PDF format maintains its clarity and readability. This compatibility is crucial for students, parents, and staff who may need to access the term dates on various devices throughout the year. Additionally, the PDF can be easily downloaded and stored on your device for offline access, making it convenient to reference the dates anytime, anywhere. The document is also optimized for viewing in popular PDF readers and web browsers, ensuring a seamless experience across different platforms. This flexibility allows users to stay informed about important academic deadlines and events, regardless of their preferred device.

The Pegs Term Dates 2024 Victoria PDF serves as an essential resource for planning and organization throughout the academic year. By providing a clear and structured overview of key dates, it empowers students, families, and educators to stay informed and prepared. The document’s digital format ensures accessibility and convenience, allowing users to download and reference it anytime, anywhere. Its compatibility across devices further enhances its utility, making it a reliable tool for the school community. With its user-friendly design and comprehensive details, the PDF supports effective academic and personal planning. It underscores the importance of staying connected to important deadlines and events, fostering a sense of readiness and engagement. Ultimately, the Pegs Term Dates 2024 Victoria PDF is a valuable asset for navigating the school year with confidence and clarity.

dkny size guide

DKNY offers a comprehensive size guide to ensure the best fit for their apparel and footwear․ Whether shopping for women, men, or kids, DKNY provides detailed measurements and size conversions (US, EU, UK) to help customers make informed choices․

Overview of DKNY Sizing

DKNY sizing is designed to cater to a wide range of customers, offering a variety of sizes for men, women, and children․ The size guide includes detailed measurements for tops, dresses, outerwear, and accessories, ensuring accurate fits․ For women, sizes range from XXS to XXL, with specific measurements for bust, waist, and hips․ Men’s sizes range from S to 2XL, with chest and waist measurements provided․ The brand also offers children’s apparel and shoe sizes, with age and height correlations for kids’ clothing․ DKNY provides size conversion charts for international customers, making it easier to navigate between US, EU, and UK sizes․ The sizing system is structured to accommodate different body types and preferences, ensuring comfort and style․ By referring to the DKNY size guide, customers can make informed purchases, avoiding the hassle of returns and exchanges․ This comprehensive approach reflects DKNY’s commitment to inclusivity and customer satisfaction․

  • Women’s sizes: XXS to XXL
  • Men’s sizes: S to 2XL
  • Children’s sizes: 2-16 years
  • Shoe sizes: US, EU, and UK conversions

Measurements are provided in inches and centimeters for precision․

Importance of Accurate Sizing for DKNY Apparel

Accurate sizing is crucial when shopping for DKNY apparel to ensure a perfect fit and optimal comfort․ Ill-fitting clothes can affect both style and functionality, making it essential to rely on the DKNY size guide․ Proper sizing enhances the overall wearing experience, allowing the fabric to drape naturally and maintain the intended silhouette․ For instance, a well-fitted top or dress can boost confidence and ensure ease of movement․ Additionally, accurate sizing reduces the need for returns or alterations, saving time and effort․ DKNY’s detailed measurements, including bust, waist, hips, and chest, help customers choose the right size without guesswork․ The brand’s commitment to precise sizing ensures that every garment meets high-quality standards, offering a seamless blend of fashion and comfort․ By prioritizing accurate sizing, DKNY caters to diverse body types, making their apparel accessible and enjoyable for everyone․ This attention to detail reflects the brand’s dedication to customer satisfaction and exceptional style․

DKNY Women’s Size Guide

DKNY’s women’s size guide offers detailed measurements for tops, dresses, skirts, and shorts․ Sizes range from XXS to XL, with numeric and letter sizing options․ The guide provides precise bust, waist, and hip measurements to ensure a perfect fit․

Women’s Tops and Blouses Size Chart

DKNY’s women’s tops and blouses size chart is designed to help you find the perfect fit․ The chart includes sizes from XXS to XL, with corresponding numeric sizes (00-16)․ Each size provides measurements for the bust, waist, and hips in inches and centimeters․ For example, an XXS corresponds to a numeric size 00, with a bust measurement of 32 inches (81․3 cm), a waist of 25 inches (63․5 cm), and hips of 35 inches (88;9 cm)․ Moving up, an XS (0) offers a bust of 33․5 inches (85․1 cm), a waist of 26 inches (66 cm), and hips of 36 inches (91․4 cm)․ A size 2 has a bust of 34․5 inches (87․6 cm), a waist of 27 inches (68․6 cm), and hips of 37 inches (94 cm)․ A size 4 (S) measures 35․5 inches (90․2 cm) in the bust, 28 inches (71․1 cm) in the waist, and 38 inches (96․5 cm) in the hips․ A size 6 measures 36․5 inches (92․7 cm) in the bust, 29 inches (73․7 cm) in the waist, and 39 inches (99․1 cm) in the hips․ Sizes 8 (M) and 10 (L) follow similar increments, ensuring a tailored fit for every body type․ This chart allows you to compare your measurements with DKNY’s sizing to select the most flattering top or blouse for your frame․ By referencing this guide, you can confidently choose the right size, ensuring both comfort and style in your DKNY apparel․

Women’s Dresses Size Chart

DKNY’s women’s dresses size chart offers a detailed guide to help you select the perfect fit․ The chart includes sizes from XXS to XL, with corresponding numeric sizes (00-16)․ Each size provides measurements for the bust, waist, and hips in inches and centimeters․ For example, an XXS (00) has a bust of 32 inches (81․3 cm), a waist of 25 inches (63․5 cm), and hips of 35 inches (88․9 cm)․ An XS (0) measures 33․5 inches (85․1 cm) in the bust, 26 inches (66 cm) in the waist, and 36 inches (91․4 cm) in the hips․ A size 2 has a bust of 34․5 inches (87․6 cm), a waist of 27 inches (68․6 cm), and hips of 37 inches (94 cm)․ A size 4 (S) measures 35․5 inches (90․2 cm) in the bust, 28 inches (71․1 cm) in the waist, and 38 inches (96․5 cm) in the hips․ A size 6 measures 36․5 inches (92․7 cm) in the bust, 29 inches (73․7 cm) in the waist, and 39 inches (99․1 cm) in the hips․ Sizes 8 (M) and 10 (L) follow similar increments, ensuring a tailored fit for every body type․ This chart allows you to compare your measurements with DKNY’s sizing to select the most flattering dress for your frame․ By referencing this guide, you can confidently choose the right size, ensuring both comfort and style in your DKNY apparel․

Women’s Skirts and Shorts Size Chart

DKNY’s women’s skirts and shorts size chart is designed to provide a precise fit for various styles․ The chart includes sizes from XXS to XL, with corresponding numeric sizes (00-16)․ Each size is paired with waist and hip measurements in centimeters․ For example, an XXS (00) features a waist of 62 cm and hips of 87․6 cm, while an XS (0) ranges from 64․7 cm to 67;3 cm in the waist and 90 cm to 92․7 cm in the hips․ A size S (4) offers a waist of 70-72․4 cm and hips of 95․5-97․8 cm, ensuring a comfortable and flattering fit․ Moving up, a size M (8) has a waist of 75-77․5 cm and hips of 100․3-102․9 cm, while a size L (12) measures 81․3-85 cm in the waist and 106․7-110․5 cm in the hips․ An XL size provides a waist of 89-92․7 cm and hips of 114․3-117․1 cm․ This detailed chart allows customers to match their measurements with DKNY’s sizing, ensuring the perfect fit for their skirts and shorts․ By referencing this guide, shoppers can confidently select the right size for their DKNY apparel, enjoying both style and comfort․ This chart is a valuable tool for anyone looking to enhance their wardrobe with DKNY’s chic and modern designs․

DKNY Men’s Size Guide

DKNY’s men’s size guide offers detailed measurements for tops, outerwear, and more․ Sizes range from S to 2XL, with chest measurements from 38-40 inches (S) to 46-48 inches (2XL)․ This ensures a precise fit for every body type․

Men’s Tops and T-Shirts Size Chart

DKNY’s men’s tops and T-shirts size chart provides a clear guide for selecting the perfect fit․ Sizes range from Small (S) to 2XL, with chest measurements spanning from 38-40 inches for S to 46-48 inches for 2XL․ Each size corresponds to specific chest measurements, ensuring accuracy․ For instance, a Medium (M) fits chests measuring 42-44 inches, while an Extra-Large (XL) accommodates 44-46 inches․ These measurements are designed to cater to various body types, ensuring comfort and style․ The chart also offers measurements in centimeters for international customers, making it universally accessible․ By referencing this chart, customers can confidently choose their size, knowing it aligns with their body measurements․ This detailed approach reflects DKNY’s commitment to providing a tailored fit for every individual․

Men’s Outerwear and Jackets Size Chart

DKNY’s men’s outerwear and jackets size chart is designed to help customers find the perfect fit for their everyday and seasonal needs․ The chart includes sizes from Small (S) to 2XL, with corresponding chest measurements ranging from 38-40 inches (S) to 46-48 inches (2XL)․ Each size is carefully calibrated to ensure comfort and style, whether you’re wearing a lightweight jacket or a heavy winter coat․ For instance, a Medium (M) size accommodates chests measuring 42-44 inches, while an Extra-Large (XL) fits chests measuring 44-46 inches․ The chart also includes numeric sizes, such as 0-16, to cater to a wide range of body types․ DKNY’s sizing ensures that the fit is neither too tight nor too loose, allowing for layering or a streamlined look․ Additionally, the size chart provides measurements in both inches and centimeters, making it accessible to customers worldwide․ By referencing this chart, men can confidently select the right size for their DKNY outerwear, ensuring a flattering and functional fit․ This attention to detail reflects DKNY’s commitment to providing high-quality, well-fitting apparel for every occasion․

DKNY Kids’ Size Guide

DKNY offers a detailed size guide for children, covering apparel and footwear․ Sizes range from 2-16 years, with corresponding heights (86-164 cm) and shoe sizes (US, EU, UK)․ This ensures a perfect fit for kids of all ages․

Children’s Apparel Size Chart

DKNY’s children’s apparel size chart provides a clear guide for selecting the right fit․ Sizes range from 2 to 16 years, with corresponding heights in centimeters․ For example, a 2-year-old typically measures 86 cm, while a 16-year-old measures 164 cm․ Each size category includes detailed measurements for chest, waist, and hips, ensuring accurate fit․ Additionally, the chart offers numeric and letter size correlations, making it easier for parents to choose the appropriate size․ The measurements are organized in a user-friendly format, allowing for quick reference․ This comprehensive chart helps ensure that DKNY clothing fits comfortably and appropriately for children of all ages․

Children’s Shoe Size Chart

DKNY’s children’s shoe size chart offers a detailed guide to ensure the perfect fit for kids’ footwear․ The chart includes sizes from US 5 to US 7․5, with corresponding EU sizes ranging from 35 to 40․5 and UK sizes from 2․5 to 9․5․ Each size is accompanied by precise measurements in inches and centimeters, allowing parents to choose the correct fit based on their child’s foot length․ For example, a US size 5 corresponds to an EU size 35, UK size 2․5, 9․0 inches, and 22․8 cm․ Similarly, a US size 7․5 matches an EU size 40․5, UK size 9․5, 9․4 inches, and 24 cm․ This chart is designed to cater to children of various ages, ensuring comfort and proper fit․ By referring to this guide, parents can confidently select the right shoe size for their kids, making shopping for DKNY footwear a seamless experience․

Additional Resources

DKNY provides additional resources to help you shop confidently․ Their size conversion chart allows easy comparison between US, EU, and UK sizes․ A detailed guide on how to measure yourself ensures accurate sizing for the best fit․

DKNY Size Conversion Chart (US, EU, UK)

DKNY offers a size conversion chart to help customers navigate between US, EU, and UK sizes seamlessly․ This chart is particularly useful for international shoppers, ensuring consistency across different regions․ For women’s apparel, sizes range from XXS to XXL, with corresponding numeric sizes․ For instance, a US size 0 aligns with an EU size 34 and a UK size 4․ Similarly, a US size 10 corresponds to an EU size 40 and a UK size 14․ Men’s sizing follows a similar pattern, with chest and waist measurements provided in inches and centimeters․ Kids’ sizes are also converted, with age and height guidelines to match US, EU, and UK standards․ Shoe sizes are included, offering conversions from US to EU and UK, ensuring the perfect fit․ This chart is a valuable tool for anyone shopping across regions, making the DKNY size guide a comprehensive resource for all customers․

How to Measure Yourself for DKNY Sizes

To ensure the best fit when shopping for DKNY apparel, accurate self-measurement is essential․ For women, measure the bust around the fullest part, the waist at the narrowest point, and the hips about 7-9 inches below the waist․ Use a flexible measuring tape and stand up straight․ For men, measure the chest under the armpits and the waist just above the hips․ For kids, measure their height and refer to the age guidelines provided in the size chart․ When measuring for shoes, trace your foot on paper and compare the length to the DKNY shoe size chart․ Always use the same units (inches or centimeters) and double-check your measurements for accuracy․ This process ensures that you can confidently select the correct size from the DKNY size guide, whether shopping for tops, dresses, outerwear, or footwear․ By taking a few minutes to measure yourself, you can enjoy a perfect fit and a seamless shopping experience with DKNY․

The DKNY size guide provides a comprehensive tool for selecting the perfect fit․ By understanding measurements and size conversions, customers can shop confidently․ Proper fit enhances comfort and style, making the DKNY size guide an invaluable resource․ Thank you for using it!

Final Tips for Using the DKNY Size Guide

Using the DKNY size guide effectively ensures a perfect fit and enhances your shopping experience․ Always measure yourself accurately before selecting sizes, as body measurements can vary slightly over time․ Refer to the specific charts for different product categories, such as tops, dresses, or outerwear, as sizing may differ․ For international shoppers, utilize the size conversion charts to find your equivalent size in US, EU, or UK standards․ If unsure between sizes, consider your personal fit preference—relaxed, tailored, or snug․ Double-check the measurements for each item, as some styles may have unique fits․ To avoid sizing mismatches, compare your measurements with the charts provided for each product line․ Lastly, consult the children’s size guide for kids’ apparel and footwear, ensuring the best fit for growing bodies․ By following these tips, you can confidently shop DKNY and enjoy a seamless, stylish experience․

user manual design

User manual design is the process of creating clear, concise guides to help users understand and interact with products effectively. It serves as a bridge between the product and its users, ensuring seamless communication and optimal usability. By incorporating visual aids, step-by-step instructions, and intuitive formatting, user manuals empower individuals to make the most of the features and functionalities available. Effective design prioritizes clarity, accessibility, and engagement, making it an essential tool for enhancing user experience.

Importance of User Manuals

User manuals are essential for ensuring that users can effectively interact with and understand a product or system. They serve as a lifeline for individuals seeking to navigate complex features, troubleshoot issues, and maximize functionality. By providing clear instructions, manuals reduce confusion and frustration, enabling users to achieve their goals efficiently. They also act as a consistent reference point, ensuring that information is accessible and reliable. Well-designed manuals enhance user experience by promoting independence and confidence, allowing individuals to utilize products without constant support. Additionally, they play a critical role in reducing errors and improving safety, especially for technical or specialized equipment. Manuals also empower users to explore advanced features, unlocking the full potential of a product. Ultimately, they are a cornerstone of effective communication between the product and its users, fostering satisfaction and loyalty. Their importance cannot be overstated in creating a seamless and intuitive user experience.

Best Practices for Writing User Manuals

Best practices for writing user manuals include prioritizing clarity and conciseness. Use visual aids and maintain consistency in terminology and formatting for better understanding.

Clarity and Conciseness in Instructions

Achieving clarity and conciseness in user manual instructions is crucial for ensuring that users can understand and follow the information without confusion. Clear instructions guide users through tasks step-by-step, using simple language and avoiding unnecessary jargon. Conciseness ensures that the content is straightforward, eliminating any redundant information that might distract or confuse the reader. By focusing on the most essential details, user manuals become more accessible, especially for those who may not have prior experience with the product. Additionally, clear instructions reduce the likelihood of errors, as users are less likely to misinterpret the steps. This approach not only enhances the user experience but also builds trust in the product and the brand. Incorporating visual aids, such as diagrams or screenshots, can further complement clear and concise text, making the instructions even more effective. Ultimately, the goal is to communicate information in a way that is both easy to understand and quick to digest.

Consistency in Terminology and Formatting

Consistency in terminology and formatting is essential for creating a user manual that is easy to follow and professional in appearance. Using the same terms throughout the manual ensures that readers are not confused by multiple names for the same feature or function. Similarly, consistent formatting, such as using bold for headings or italics for emphasis, helps users quickly understand the structure and navigate the content. Maintaining uniformity in styles, such as font size and color, enhances readability and makes the manual visually appealing. Consistency also applies to the way instructions are presented, ensuring that similar tasks are described in a similar manner. This approach reduces confusion and makes the manual more intuitive for users. By adhering to a set of guidelines or a style guide, writers can ensure that the terminology and formatting remain consistent throughout the document. This level of attention to detail significantly improves the overall quality and usability of the user manual.

Use of Visual Aids for Better Understanding

The use of visual aids in user manuals significantly enhances clarity and comprehension, making complex information more accessible to users; Diagrams, flowcharts, and screenshots are effective tools for illustrating processes, highlighting key components, and demonstrating how features work. Screenshots, for example, provide real-time examples of what users will see on their screens, helping them navigate interfaces with confidence. Icons and symbols can also simplify instructions by visually representing actions or statuses, reducing the need for lengthy explanations. Consistently using visuals throughout the manual ensures a cohesive and engaging experience. Properly labeling and explaining these aids is crucial to avoid confusion. By incorporating high-quality, relevant visuals, user manuals can cater to different learning styles, making the content more approachable and user-friendly. This approach not only improves understanding but also reduces the likelihood of errors during task execution.

Step-by-Step Instructions for Complex Tasks

When tackling complex tasks in user manuals, it’s essential to provide clear, step-by-step instructions that guide users through each process. Breaking down intricate operations into smaller, manageable parts ensures that users can follow along without confusion. Each step should be concise yet detailed enough to prevent ambiguity. Use straightforward language and avoid jargon unless necessary, ensuring that the instructions are accessible to all users, regardless of their expertise level. Incorporating examples or screenshots at critical points can further enhance understanding. Additionally, anticipate common pain points and offer tips or warnings to help users avoid mistakes. Testing the instructions with real users can highlight areas that need clarification, ensuring the final guide is both effective and user-friendly. By structuring complex tasks in a logical, easy-to-follow manner, user manuals become invaluable resources that empower users to master even the most challenging features.

Structure of a User Manual

A well-organized user manual includes sections like introduction, table of contents, and troubleshooting. Logical organization ensures users can easily navigate and access information, enhancing overall usability and accessibility.

Identifying the Target Audience

Identifying the target audience is a critical step in creating an effective user manual. Understanding who will use the manual helps tailor the content to their specific needs, skill levels, and preferences. For example, a manual for technical experts may include advanced terminology, while one for non-technical users should avoid jargon. Conducting user research or surveys can reveal key insights about the audience’s background, familiarity with the product, and common tasks they perform. Creating user personas can also guide the design and tone of the manual. Additionally, considering the audience’s preferred learning style—whether they prefer text, images, or step-by-step instructions—ensures the manual is engaging and accessible. By focusing on the target audience, the manual becomes a more valuable resource, addressing their unique challenges and enhancing their overall experience with the product.

Creating a Table of Contents

Creating a table of contents is essential for organizing and navigating a user manual effectively. It serves as a roadmap, guiding users through the document and helping them locate specific information quickly. A well-structured table of contents improves the overall usability of the manual by clearly outlining the hierarchy of topics and sections. It is important to ensure that the table of contents is comprehensive yet concise, covering all major sections without overwhelming the reader; Each entry should be descriptive enough to indicate the content of the section but brief enough to maintain readability. Additionally, the table of contents should be customized to reflect the unique structure and requirements of the product or system being documented. By organizing information logically and providing easy access to key topics, a thoughtfully designed table of contents enhances the user experience and makes the manual more accessible and user-friendly.

Welcome to the User Manual for [Product Name]. Thank you for choosing our product. This manual is designed to help you understand and use your product effectively. Within these pages, you will find comprehensive information to guide you through installation, features, and troubleshooting. We encourage you to read this manual carefully to ensure you get the most out of your product. The manual is regularly updated to reflect the latest features and improvements. If you have any questions or need further assistance, please do not hesitate to contact our support team. Happy reading!

Developing a Troubleshooting Section

A well-structured troubleshooting section is essential for addressing common issues users may encounter. It should be user-friendly, with clear descriptions of potential problems and step-by-step solutions. Organize the section by categorizing issues based on frequency or severity, ensuring users can quickly locate relevant information. Use simple language and avoid technical jargon to make the content accessible to all users. Include visual aids like screenshots or diagrams to help illustrate solutions. Additionally, provide tips for preventing issues and offer alternative solutions when possible. It’s important to keep the tone reassuring, emphasizing that most problems are easy to resolve. Regularly update the troubleshooting section to address new issues that arise. By focusing on clarity and practicality, this section becomes a valuable resource for enhancing user satisfaction and reducing frustration. Always aim to make users feel supported and empowered to resolve issues independently.

Visual Elements in User Manuals

Visual elements like diagrams, screenshots, and icons simplify complex information, making instructions more engaging and easier to follow. They help users understand processes intuitively, enhancing the overall usability and satisfaction of the manual.

Diagrams and Flowcharts

Diagrams and flowcharts are essential visual tools in user manuals, enabling users to grasp complex processes and relationships quickly. They simplify technical information by breaking it down into visually organized steps or components. For instance, a flowchart can illustrate a sequence of actions, making it easier for users to follow along without getting lost in text-heavy explanations. Diagrams, on the other hand, are particularly useful for depicting physical structures or systems, such as hardware components or software architectures. These visual aids enhance comprehension by providing a clear, at-a-glance overview of how things work or how to perform a task. By reducing the need for lengthy written descriptions, diagrams and flowcharts make manuals more accessible and user-friendly. They are especially beneficial for audiences with limited technical expertise or those who prefer visual learning. Incorporating these elements ensures that users can engage with the material more effectively, fostering a better overall experience.

Screenshots and Images

Screenshots and images are powerful tools in user manuals, allowing users to visualize tasks and interfaces directly. They provide clear, real-world examples of what to expect, making complex instructions more accessible. For instance, a screenshot of a dialog box can show users exactly where to enter their name or select an option. Images are particularly effective for demonstrating physical products, such as hardware components or assembly steps. By highlighting specific buttons, menus, or features, these visual aids reduce confusion and guide users through processes intuitively. High-quality, relevant images ensure that users can easily relate the visual content to the written instructions. Moreover, screenshots and images can be annotated with arrows, labels, or callouts to emphasize key elements. This combination of visual and textual information creates a comprehensive learning experience, helping users navigate and understand the product more efficiently. Regularly updating images to reflect software or design changes is crucial for maintaining accuracy and user trust.

Icons and Symbols

Icons and symbols play a crucial role in user manuals by providing quick visual cues that enhance understanding and navigation. They are particularly useful for representing actions, statuses, or sections within the manual. For example, a save icon or a warning symbol can instantly convey a specific action or caution, reducing the need for lengthy explanations. These visual elements are especially beneficial in multicultural contexts, as they transcend language barriers. Standardization of icons is essential; using universally recognized symbols ensures consistency and avoids confusion. Icons should be simple, clear, and relevant to their context, avoiding ambiguity. Proper placement near related text or instructions helps guide users effectively. Additionally, including a legend or key to explain symbols ensures that all users can interpret them correctly. Icons also break up text, making manuals more engaging and easier to scan. By integrating icons and symbols thoughtfully, manuals become more intuitive and user-friendly, enhancing the overall learning experience. Regular updates to icon designs ensure they remain relevant and aligned with modern visual standards.

Interactive Manuals and Tutorials

Interactive manuals and tutorials provide dynamic, hands-on learning experiences, offering step-by-step guidance and real-time feedback. They adapt to user actions, enhancing engagement and understanding through multimedia elements like videos and clickable demonstrations. These tools empower users to explore features intuitively, making complex tasks manageable and fostering independence. Interactive formats ensure users can learn at their own pace, reducing the need for external support. By integrating tutorials directly into the product or manual, users receive immediate assistance, improving overall satisfaction and proficiency. This approach is particularly effective for tech-savvy audiences and modern, feature-rich products. Interactive manuals redefine traditional documentation by making learning interactive and accessible. They bridge the gap between static instructions and immersive, user-driven experiences, ensuring users master the product efficiently. Through interactivity, manuals evolve into powerful educational tools, enhancing user confidence and skill development. This modern approach to documentation is essential for meeting the demands of today’s digital landscape. Interactive manuals and tutorials are revolutionizing how users engage with and understand products, making learning seamless and enjoyable. They represent the future of user guidance, combining functionality with accessibility to create unparalleled learning experiences. By leveraging technology, interactive manuals empower users to unlock the full potential of products, fostering a deeper understanding and appreciation of their capabilities. As technology advances, interactive manuals will continue to play a pivotal role in user education, setting new standards for clarity, engagement, and effectiveness in documentation. The integration of interactive elements ensures that manuals remain relevant and aligned with the evolving needs of users, providing a dynamic and responsive learning environment. Through interactive manuals and tutorials, users gain the knowledge and confidence to utilize products to their fullest extent, driving success and satisfaction in their interactions. This innovative approach to user manuals is transforming the way people learn and interact with products, making it an indispensable tool in modern documentation. By combining visual, textual, and interactive elements, these manuals create a holistic learning experience that caters to diverse user preferences and learning styles. Interactive manuals and tutorials are not just a trend but a necessity in today’s fast-paced, technology-driven world, ensuring users can keep up with the latest advancements effortlessly. They embody the perfect blend of tradition and innovation, preserving the core purpose of user manuals while embracing the possibilities of digital interaction. As users increasingly expect intuitive and engaging experiences, interactive manuals and tutorials are becoming the cornerstone of effective documentation, setting a new benchmark for user guidance and support. The future of user manuals lies in interactivity, where learning is no longer passive but an active, immersive journey tailored to individual needs and preferences. Interactive manuals and tutorials are leading this transformation, ensuring users are equipped with the knowledge and skills required to thrive in a rapidly changing world. By prioritizing interactivity, these manuals not only enhance user understanding but also strengthen the overall user experience, creating a lasting positive impression. This evolution in documentation is a testament to the power of innovation in addressing the dynamic needs of users, ensuring that manuals remain a vital and relevant resource for years to come. Through continuous refinement and adaptation, interactive manuals and tutorials will continue to redefine the boundaries of user education, inspiring new possibilities in how we learn and interact with products. The integration of interactivity into user manuals is a celebration of progress, where tradition meets innovation to create something truly exceptional. As users demand more from their documentation, interactive manuals and tutorials stand as a beacon of excellence, delivering value, engagement, and empowerment. This is the future of user manuals—intelligent, interactive, and infinitely adaptable to the needs of the modern user. By embracing this shift, developers and creators can ensure their products are accompanied by documentation that not only informs but also inspires, fostering a deeper connection between users and the tools they rely on. Interactive manuals and tutorials are more than just a new way to present information; they are a revolution in how users engage with and understand the world around them. They represent a harmonious blend of functionality and creativity, where learning is both effective and enjoyable. As we move forward in this digital age, interactive manuals and tutorials will undoubtedly remain at the forefront of user education, setting the standard for what it means to provide exceptional guidance and support. The era of interactive manuals has arrived, and it is here to stay, transforming the landscape of user documentation forever. By choosing interactivity, we choose to empower users, enabling them to unlock the full potential of the products they use every day. This is the essence of interactive manuals and tutorials—a commitment to user-centered design and a dedication to excellence in documentation. The impact of interactive manuals and tutorials extends beyond mere instruction; they inspire confidence, curiosity, and creativity, fostering a community of users who are not just consumers but active participants in the learning process. As we continue to explore the possibilities of interactivity, the future of user manuals looks brighter than ever, promising even more innovative ways to engage and educate users. Interactive manuals and tutorials are not just a tool for learning; they are a gateway to endless possibilities, where users can explore, discover, and master new skills with ease. This is the power of interactivity in user manuals—a power that will continue to shape the way we interact with and understand the world around us. By embracing this power, we can create documentation that truly makes a difference, leaving a lasting legacy of empowerment and knowledge for generations to come. The journey of interactive manuals and tutorials is just beginning, and it is an exciting path filled with promise and potential. Let us embark on this journey together, crafting user manuals that inspire, educate, and empower, ensuring that users everywhere can unlock the full potential of the products they use. The future is interactive, and it is bright.

Step-by-Step Tutorials

Step-by-step tutorials are essential for guiding users through complex tasks in an interactive and intuitive manner. These tutorials break down processes into manageable, sequential actions, ensuring users can follow along without confusion. By providing clear, actionable instructions, tutorials help users achieve specific goals efficiently. Visual aids, such as screenshots or icons, often accompany text to enhance understanding. Tutorials may also include real-time feedback, adapting to user actions to provide personalized guidance. This approach reduces frustration and builds confidence, especially for novice users. Many modern user manuals incorporate step-by-step tutorials as part of interactive guides, offering users the ability to learn by doing. These tutorials are particularly effective for software applications, hardware setups, or any process requiring precise sequences of actions. By focusing on clarity and practicality, step-by-step tutorials empower users to master tasks independently, aligning with the broader goals of user manual design.

Guided Tours and On-Screen Help

Guided tours and on-screen help are interactive elements designed to assist users in real-time as they navigate a product or system. These tools provide context-specific guidance, often appearing at critical points in the user journey to explain features, options, or next steps. Unlike static manuals, guided tours adapt to user actions, offering a dynamic learning experience. On-screen help might include tooltips, pop-up explanations, or highlighted buttons that draw attention to key elements. These features are particularly useful for reducing the learning curve for new users. By integrating visual cues and concise instructions, guided tours and on-screen help empower users to explore and master the product without needing to refer to external documentation. This approach not only enhances user satisfaction but also ensures that users can make the most of the product’s capabilities from the start. These interactive aids are increasingly popular in modern user manual design, bridging the gap between instruction and application.

black and decker handy steamer manual

The Black and Decker Handy Steamer manual serves as a comprehensive guide for models like HS90, HS800, and HS1000, detailing their features, proper usage, and maintenance for optimal cooking and safety.

1.1 Overview of the Handy Steamer Plus Series

The Black and Decker Handy Steamer Plus series offers versatile kitchen appliances designed for efficient cooking. Models like the HS90, HS800, and HS1000 combine rice cooking and steaming in one compact unit. These steamers feature non-stick inner pots, Flavor Scenter technology for added flavor, and easy-to-use controls. They are ideal for preparing healthy meals, including rice, vegetables, seafood, and more. The series emphasizes convenience, durability, and ease of cleaning, making it a practical choice for home cooks seeking to simplify meal preparation while maintaining nutrition and flavor.

1.2 Importance of Reading the Manual

Reading the Black and Decker Handy Steamer manual is essential for understanding its operation, safety precautions, and maintenance. It provides detailed instructions for assembling, using, and cleaning the appliance. The manual also outlines warranty information, troubleshooting tips, and guidelines for optimal performance. By following the manual, users can ensure safe operation, prevent damage, and extend the product’s lifespan. It helps users make the most of features like the Flavor Scenter technology and customizable steaming options, while avoiding common mistakes that could compromise efficiency or safety.

1.3 Key Features of the Black and Decker Handy Steamer

The Black and Decker Handy Steamer is designed for versatility and convenience, offering features like a non-stick inner pot, Flavor Scenter technology, and customizable steaming options. Its compact design makes it ideal for small kitchens, while the easy-to-use interface ensures intuitive operation. The steamer also includes multiple preset settings for rice, vegetables, and seafood, allowing for precise cooking control. Additionally, its durable construction and dishwasher-safe components simplify maintenance, making it a practical addition to any household kitchen.

Black and Decker Handy Steamer Plus HS90

The Black and Decker Handy Steamer Plus HS90 is a compact, lightweight rice cooker and steamer designed for easy cooking and cleaning with a non-stick inner pot.

2.1 Design and Compactness

The Black and Decker Handy Steamer Plus HS90 features a compact and lightweight design, making it ideal for small kitchens or limited countertop space. Its sleek, modern appearance blends seamlessly with most kitchen decors. The unit is designed for portability, allowing easy storage when not in use. The compact size ensures it occupies minimal space while still delivering efficient performance for cooking rice and steaming vegetables. This design makes it a practical choice for everyday use without compromising on functionality or style.

2.2 Non-Stick Inner Pot and Cleaning

The Black and Decker Handy Steamer Plus HS90 features a non-stick inner pot, which prevents food from sticking and simplifies cleaning. After use, the pot can be washed with warm, soapy water and a soft sponge. Avoid using abrasive cleaners or bleach, as they may damage the non-stick coating. Regular cleaning ensures optimal performance and longevity of the steamer. The design allows for easy maintenance, making it a hassle-free addition to your kitchen routine.

2.3 Versatility in Cooking Rice and Steaming Vegetables

The Black and Decker Handy Steamer Plus HS90 excels at cooking rice and steaming vegetables with ease. Its non-stick inner pot ensures even heat distribution, allowing for perfectly cooked rice and tender vegetables. The steamer’s design enables simultaneous cooking of rice and steaming, saving time and effort. Users can also add flavor to dishes by incorporating seasonings or herbs during the steaming process. This versatility makes it a practical and efficient kitchen appliance for preparing healthy, delicious meals effortlessly.

2.4 Safety Precautions and Usage Tips

For safe operation, avoid touching hot surfaces and use potholders when handling the steamer. Keep children away while in use and ensure the appliance is placed on a stable surface. Regularly clean the non-stick pot with gentle agents to prevent residue buildup. Avoid using bleach or abrasive cleaners, as they may damage the coating. Always follow the manual’s guidelines for water levels and steaming times to ensure optimal performance and longevity of the Black and Decker Handy Steamer.

Black and Decker Flavor Scenter Steamer HS1776

The Black and Decker Flavor Scenter Steamer HS1776 is a versatile kitchen appliance designed for steaming vegetables, seafood, and more, with a unique flavor infusion system for enhanced taste.

3.1 Unique Flavor Scenter Technology

The Flavor Scenter Technology in the Black and Decker HS1776 allows users to infuse flavors directly into their food while steaming. By adding herbs, spices, or lemon slices to the designated compartment, the steam circulates these flavors evenly. This innovative system enhances the taste of vegetables, seafood, and other dishes without extra effort. The technology ensures a delicious and aromatic cooking experience, making it a standout feature for home chefs seeking to elevate their meals. Cleaning is also simplified due to the non-stick surfaces and dishwasher-safe components.

3.2 Steaming Times and Variable Controls

The Black and Decker Flavor Scenter Steamer HS1776 offers variable controls for precise steaming times, allowing users to customize cooking durations for different foods. The adjustable timer ensures optimal results for vegetables, seafood, and grains. With clear controls, users can easily set and monitor cooking progress. The steamer also features automatic shut-off for added safety and convenience. This flexibility makes it ideal for preparing a variety of dishes with consistent outcomes. Refer to the manual for specific steaming times to achieve the best results for your meals.

3.3 Suitable for Vegetables, Seafood, and More

The Black and Decker Flavor Scenter Steamer HS1776 is designed to cook a wide variety of foods, including fresh vegetables, delicate seafood, and even grains. Its versatile design allows for even steam distribution, ensuring tender and flavorful results. Whether you’re preparing crisp vegetables or succulent shrimp, the steamer delivers consistent outcomes. Additionally, it’s ideal for cooking eggs, tofu, or other proteins. The large capacity and adjustable settings make it perfect for diverse meal preparations, catering to both healthy and flavorful cooking needs.

3.4 Maintenance and Care Instructions

Regular maintenance ensures the longevity and efficiency of the Black and Decker Flavor Scenter Steamer HS1776. After each use, clean the inner pot and steam tray with warm water and mild detergent. Avoid using bleach or abrasive cleaners, as they may damage the surfaces. Dry the steamer thoroughly to prevent rust. Descale the appliance periodically to remove mineral buildup, especially in hard water areas. Proper care and timely cleaning will maintain its performance and ensure safe, hygienic cooking for years to come.

Black and Decker Handy Steamer HS800

The Black and Decker Handy Steamer HS800 offers a compact, lightweight design with an easy-to-use interface, incorporating the Flavor Scenter feature for enhanced cooking versatility and energy efficiency.

4.1 Compact and Lightweight Design

The Black and Decker Handy Steamer HS800 boasts a compact and lightweight design, making it ideal for small kitchens or limited counter space. Its portable build allows for easy storage and transportation, ensuring convenience in various cooking environments. The appliance’s sleek and modern construction not only enhances its aesthetic appeal but also ensures durability, providing a reliable cooking solution for everyday use. This space-saving design makes it a practical addition to any home, blending functionality with ease of use.

4.2 Easy-to-Use Interface and Controls

The Black and Decker Handy Steamer HS800 features an intuitive interface with straightforward controls, ensuring effortless operation for users of all skill levels. The digital display and buttons provide clear navigation for setting timers and monitoring cooking progress. Its user-friendly design minimizes complexity, allowing quick access to essential functions. The controls are designed to be responsive, making it easy to adjust settings mid-cooking if needed. This simplicity ensures a hassle-free experience, enabling users to focus on achieving perfectly cooked meals without unnecessary complications.

4.3 Incorporating the Flavor Scenter Feature

The Black and Decker Handy Steamer HS800 includes the innovative Flavor Scenter feature, designed to enhance the taste of your dishes. This feature allows users to add herbs, spices, or other flavorings directly to the water reservoir, infusing your food with aromatic flavors during cooking. The Flavor Scenter ensures even distribution of flavors, making it ideal for seafood, vegetables, and grains. This unique addition elevates the steaming process, providing a more delicious and customizable cooking experience while maintaining the appliance’s ease of use and versatility.

4.4 Troubleshooting Common Issues

The Black and Decker Handy Steamer HS800 manual provides guidance for resolving common issues. If the steamer does not turn on, ensure it is properly plugged in and the outlet is functioning. For uneven cooking, check water levels and ensure the lid is sealed tightly. Cleaning regularly prevents mineral buildup, which can affect performance. Avoid using abrasive cleaners or bleach, as they may damage the non-stick surfaces. Refer to the manual for detailed solutions and maintenance tips to address any operational problems effectively.

Black and Decker Handy Steamer HS1000

The Black and Decker Handy Steamer HS1000 features advanced steaming technology, customizable options, and durable construction, making it an efficient and versatile kitchen appliance for home use.

5.1 Advanced Steaming Technology

The Black and Decker Handy Steamer HS1000 boasts advanced steaming technology designed for even heat distribution and faster cooking times. Its digital controls allow for precise temperature adjustments, ensuring optimal results for various foods. With preset settings for vegetables, seafood, and grains, this model offers versatility and convenience. The steam circulation system ensures consistent cooking, while the large, easy-to-clean inner pot accommodates generous portions. This technology enhances nutrient retention and flavor, making it ideal for healthy, delicious meals. Energy-efficient and user-friendly, it stands out as a modern kitchen essential.

5.2 Customizable Steaming Options

The Black and Decker Handy Steamer HS1000 offers customizable steaming options to suit various cooking needs. Its digital controls allow users to set specific steam times and temperatures, ensuring perfect results for delicate vegetables, hearty grains, or succulent seafood. With preset settings and adjustable steam intensity, this model provides unparalleled flexibility. The intuitive interface makes it easy to tailor cooking preferences, while the large display ensures clear monitoring of progress. This feature enhances versatility, allowing users to experiment with diverse recipes while maintaining optimal flavor and texture. It’s designed for both convenience and precision.

5.3 Durable and Easy-to-Clean Construction

The Black and Decker Handy Steamer HS1000 features a durable design with high-quality materials, ensuring long-lasting performance. Its stainless steel components and BPA-free parts provide safety and reliability. The non-stick inner pot resists food residue, making cleanup effortless. Dishwasher-safe parts further simplify maintenance. The steamer’s compact build and smooth surfaces prevent food from sticking, reducing scrubbing efforts. This construction ensures easy upkeep while maintaining hygiene standards, making it a practical choice for everyday use. Its robust design withstands regular use, offering durability without compromising on ease of cleaning.

5.4 Energy Efficiency and Safety Features

The Black and Decker Handy Steamer HS1000 is designed with energy efficiency in mind, using minimal power while delivering optimal performance. Safety features include automatic shut-off, thermal protection, and secure locking mechanisms to prevent accidental openings. These features ensure safe operation and energy conservation. The steamer’s advanced design minimizes heat loss, making it both eco-friendly and reliable. Built-in safety sensors monitor temperature and pressure, providing additional layers of protection. This combination of efficiency and safety makes the HS1000 a secure and responsible choice for home cooking.

Accessories and Additional Features

Black and Decker Handy Steamer models come with steam baskets, trays, and Flavor Scenter accessories, enhancing versatility. Cleaning kits and replacement parts ensure optimal performance and longevity.

6.1 Steam Baskets and Trays

The Black and Decker Handy Steamer includes steam baskets and trays designed to hold food securely during cooking. These accessories are typically made of durable, dishwasher-safe materials, ensuring easy cleaning. The steam baskets allow for optimal steam circulation, promoting even cooking of vegetables, seafood, and other dishes. Trays can be used for organizing food or catching excess water. Both are versatile, making meal preparation more efficient and convenient. They enhance the overall steaming experience, providing practical solutions for everyday cooking needs.

6.2 Flavor Scenter Accessories

The Black and Decker Handy Steamer’s Flavor Scenter accessories are designed to enhance the taste of your dishes. These include specialized trays or infusers that allow you to add herbs, spices, or other flavorings directly to the steam. This feature ensures even distribution of flavors, making your meals more aromatic and delicious. The accessories are easy to clean and dishwasher-safe, maintaining their quality over time. They are a great way to customize your cooking experience, adding a professional touch to homemade recipes effortlessly.

6.3 Optional Cleaning Kits

Optional cleaning kits for the Black and Decker Handy Steamer are available to help maintain its performance and longevity. These kits typically include specialized cleaning solutions, soft brushes, and non-abrasive pads designed to gently remove food residue and mineral buildup without damaging the surfaces. Regular use of these kits ensures the steamer remains hygienic and functions efficiently. They are especially useful for tackling stubborn stains and limescale deposits, keeping your appliance in pristine condition for years to come.

6.4 Replacement Parts Availability

Replacement parts for the Black and Decker Handy Steamer are readily available through authorized service centers or the company’s official website. Users can purchase genuine components such as steam baskets, lids, and seals to ensure optimal performance and safety. These parts are designed to maintain the appliance’s efficiency and longevity. For convenience, customers can also order replacement parts online or consult local retailers specializing in Black and Decker products. Always use genuine parts to uphold warranty conditions and ensure proper functionality.

The Black and Decker Handy Steamer Manual provides essential guidance for optimal use, ensuring efficient and safe cooking experiences with its user-friendly design and features.

7.1 Summary of Key Features

The Black and Decker Handy Steamer manuals highlight models like the HS90, HS800, and HS1000, offering compact designs, non-stick inner pots, and versatile cooking options. Features include Flavor Scenter technology for enhanced taste, easy-to-use interfaces, and customizable steaming controls. These steamers are designed for efficiency, safety, and durability, making them ideal for cooking rice, steaming vegetables, and preparing seafood. Regular maintenance tips and safety precautions are also emphasized to ensure longevity and optimal performance of the appliances.

7.2 Final Tips for Optimal Use

For optimal use, ensure the steamer is cleaned regularly with a soft cloth and mild detergent. Avoid using abrasive cleaners or bleach; Always measure water levels correctly and place the steamer on a stable, heat-resistant surface. Unplug the appliance when not in use for safety. Follow recommended steaming times for vegetables, seafood, and rice to achieve the best results. Lastly, refer to the manual for troubleshooting common issues and maintain the appliance as instructed to extend its lifespan and performance.

7.3 Importance of Regular Maintenance

Regular maintenance ensures optimal performance and longevity of your Black and Decker Handy Steamer. Clean the non-stick pot and steam basket after each use to prevent food residue buildup. Descale the appliance periodically to remove mineral deposits, especially in areas with hard water. Check for wear and tear on parts like seals and gaskets, replacing them as needed. Always store the steamer in a dry place to avoid moisture-related issues. By following these maintenance steps, you can ensure your steamer continues to function efficiently and safely for years to come.

christmas music for piano pdf

Christmas music for piano PDF offers a delightful way to enjoy festive melodies, from classic carols to modern arrangements, perfect for pianists of all skill levels.

Overview of Christmas Piano Sheet Music

Christmas piano sheet music offers a wide variety of festive pieces, from traditional carols like “Silent Night” and “Jingle Bells” to classical masterpieces like Bach’s “Jesu, Joy of Man’s Desiring” and contemporary jazz arrangements. These compositions cater to pianists of all skill levels, ranging from simple melodies for beginners to complex arrangements for advanced players. Many resources provide free PDF downloads, making it easy to access high-quality sheet music. Websites like MuseScore and Capotasto Music are popular platforms for downloading Christmas piano music in PDF format. Whether you’re looking for solo performances, duets, or ensemble pieces, Christmas piano sheet music is a great way to celebrate the holiday spirit with music.

Why Choose PDF Format for Christmas Piano Music

PDF format is a preferred choice for Christmas piano music due to its convenience and accessibility. PDF files maintain high-quality sheet music layouts, ensuring clarity and readability. They are easily downloadable and compatible with all devices, making them ideal for quick access. Additionally, PDFs are sharable and printable, allowing pianists to practice or perform without restrictions. Many websites offer free PDF downloads of Christmas piano music, reducing costs and expanding availability. This format also preserves the original composition’s integrity, making it a reliable choice for both beginners and advanced musicians. Overall, PDFs provide a practical and efficient way to enjoy Christmas piano music, fostering a seamless musical experience during the holiday season.

Popular Christmas Carols for Piano

Popular Christmas carols like “Silent Night” and “Jingle Bells” are beloved for their timeless melodies and festive spirit, making them perfect for piano arrangements during the holiday season.

“Silent Night” ‒ A Timeless Christmas Classic

“Silent Night” is one of the most recognizable and beloved Christmas carols worldwide, offering a serene and peaceful melody that resonates during the holiday season. Composed by Franz Xaver Gruber and Joseph Mohr, this carol has been beautifully adapted for piano, making it a staple in festive repertoires. Its simple yet emotive harmony makes it accessible to pianists of all levels, from beginners to advanced musicians. Available in various PDF arrangements, “Silent Night” can be played as a solo piece or accompanied by vocals, ensuring its versatility. The carol’s timeless appeal lies in its ability to evoke a sense of calm and joy, making it a cherished part of Christmas traditions across generations and cultures.

“Jingle Bells” ⎯ A Fun and Catchy Tune

“Jingle Bells,” composed by James Lord Pierpont, is a lively and iconic Christmas song that brings joy and festive cheer. Its upbeat rhythm and memorable melody make it a favorite for pianists of all skill levels. Available in various PDF arrangements, “Jingle Bells” can be played as a simple tune for beginners or as a more elaborate piece for advanced players. The song’s versatility allows for creative interpretations, including jazz-inspired variations and duet arrangements. Its catchy harmony and energetic vibe make it a crowd-pleaser during holiday gatherings. With free sheet music readily available online, pianists can easily access and enjoy playing this timeless classic, ensuring its continued popularity for generations to come.

Classical Christmas Piano Pieces

Classical Christmas piano pieces, like Bach’s “Jesu, Joy of Man’s Desiring” and Mozart’s “Eine Kleine Nachtmusik,” offer elegant and sophisticated adaptations perfect for festive performances, blending tradition with timeless beauty.

Bach’s “Jesu, Joy of Man’s Desiring” ‒ A Christmas Adaptation

Bach’s “Jesu, Joy of Man’s Desiring” is a revered piece, originally from Cantata 147, that has been beautifully adapted for Christmas celebrations. This timeless composition, with its serene and uplifting melody, is often rearranged to evoke the spirit of the season. The piano adaptation maintains the original’s emotional depth while incorporating festive nuances, making it a popular choice for holiday performances. Its harmonious structure and soothing rhythm provide a perfect backdrop for reflecting on the joy of Christmas. Available in PDF format, this arrangement is accessible to pianists of various skill levels, ensuring that the beauty of Bach’s music can be shared during the festive season.

Mozart’s “Eine Kleine Nachtmusik” ⎯ A Classical Christmas Touch

Mozart’s “Eine Kleine Nachtmusik” brings a sophisticated elegance to Christmas music. This serenade, typically performed by orchestras, has been adapted for solo piano, infusing it with a festive charm. The arrangement retains the original’s graceful melodies while adding seasonal flair, making it ideal for holiday playlists. Its gentle harmonies and rhythmic precision create a refined ambiance, perfect for celebrating Christmas with classical music. Available in PDF format, this piece is accessible to pianists seeking to blend traditional and contemporary styles. It’s a delightful way to experience Mozart’s genius during the festive season, offering both musical challenge and emotional resonance.

Christmas Jazz and Modern Arrangements for Piano

Christmas jazz and modern piano arrangements blend classic carols with soulful improvisations and funky rhythms, offering fresh twists on timeless holiday tunes for all skill levels.

Contemporary Takes on Traditional Carols

Contemporary arrangements of traditional Christmas carols breathe new life into beloved tunes, blending modern styles with timeless melodies. These arrangements often feature fresh harmonies, rhythmic twists, and creative intros, making them appealing to both classical and modern pianists. Many artists and composers offer their unique interpretations, such as jazzy renditions of “Jingle Bells” or minimalist versions of “Silent Night.” These pieces are widely available in PDF format, allowing pianists to easily download and play them. Whether you’re looking for a funky twist on “Deck the Halls” or a soulful take on “O Holy Night,” contemporary arrangements provide a refreshing way to enjoy classic carols during the holiday season.

Jazz-Inspired Christmas Piano Music

Jazz-inspired Christmas piano music brings a sophisticated and energetic vibe to holiday performances. These arrangements infuse classic carols with improvisational elements, syncopated rhythms, and rich chord progressions. Pieces like “Jingle Bells” and “Silent Night” are reimagined with swinging grooves and harmonic complexity, offering a fresh take on traditional tunes. Many contemporary artists and composers create these arrangements, blending jazz techniques with festive cheer. With the availability of PDF sheet music, pianists can easily access and perform these stylish interpretations. Whether you’re a seasoned musician or an enthusiast, jazz-inspired Christmas music adds a unique flair to the holiday repertoire, making it a delightful choice for both practice and performance.

Christmas Piano Music for Beginners

Christmas piano music for beginners offers simple, easy-to-learn pieces, perfect for early learners. These sheets feature basic melodies, making them ideal for young pianists to start with festive songs.

Simple Melodies for Early Learners

Simple Christmas melodies are perfect for early learners, offering a gentle introduction to playing festive music. These pieces feature basic chords and rhythms, making them easy to grasp. Popular carols like “Jingle Bells” and “Silent Night” are often simplified, allowing young pianists to enjoy the holiday spirit while improving their skills. Many free PDF resources provide these arrangements, ensuring accessibility for all. These melodies are not only fun but also build foundational techniques, encouraging a love for piano playing from an early age. They are an excellent starting point for anyone looking to explore Christmas music without feeling overwhelmed.

“First Pieces” ⎯ A Collection for Young Pianists

“First Pieces” is a charming collection designed for young pianists, offering simple yet engaging Christmas music. This set includes beloved carols like “Silent Night” and “Jingle Bells”, arranged in a way that is easy for beginners to master. The melodies are carefully simplified to focus on basic techniques, such as single-note playing and simple chords, making them ideal for early learners. Additionally, the collection often includes fun arrangements that introduce young musicians to festive rhythms and harmonies. Many of these pieces are available as free PDF downloads from reputable sources like Capotasto Music, ensuring accessibility for all. This collection is a wonderful way to nurture a child’s musical journey while celebrating the holiday season.

Free Elementary Piano Sheets for Christmas

Free elementary piano sheets for Christmas are an excellent resource for young learners, offering a fun way to explore festive music. Websites like Capotasto Music and MuseScore provide high-quality PDF downloads of classic carols such as “Silent Night” and “Jingle Bells”, arranged specifically for beginners. These sheets often feature simple melodies, basic chords, and clear notation, making them accessible for early learners; Many collections are designed to introduce children to holiday tunes while reinforcing foundational piano skills. Parents and teachers can easily print these sheets, ensuring that young pianists can enjoy the magic of Christmas music without cost or complexity. These free resources are a great way to foster a love for playing during the holiday season.

Intermediate Christmas Piano Music

Intermediate Christmas piano music offers a variety of arrangements blending traditional and contemporary styles, perfect for developing pianists seeking to enhance their skills with festive pieces.

Arrangements for Developing Pianists

Arrangements for developing pianists provide a bridge between simplicity and complexity, offering pieces that challenge without overwhelming. These selections often feature familiar melodies with added harmonies and rhythms, allowing pianists to refine their technique while maintaining a festive spirit. Popular carols like “We Wish You a Merry Christmas” and “Jingle Bells” are frequently adapted into duets, enabling collaborative play and enhancing musical interaction. Additionally, some arrangements incorporate jazz-inspired elements, introducing syncopation and chord progressions that broaden musical understanding. These intermediate pieces are designed to foster growth, ensuring that pianists can enjoy the beauty of Christmas music while advancing their skills.

Traditional and Contemporary Mix for Intermediate Levels

A traditional and contemporary mix for intermediate levels offers pianists a blend of classic carols and modern twists, creating engaging and challenging pieces. Timeless favorites like “Silent Night” and “Jingle Bells” are reimagined with contemporary arrangements, incorporating techniques such as arpeggios, syncopation, and harmonic variations. These pieces cater to pianists seeking to enhance their skills while exploring a variety of styles. The integration of modern elements keeps the music fresh and exciting, appealing to those who enjoy both traditional and innovative sounds. This mix ensures that intermediate pianists can grow musically while enjoying the festive spirit through diverse and inspiring arrangements.

“We Wish You a Merry Christmas” ⎯ Duet Arrangements

“We Wish You a Merry Christmas” duet arrangements for piano are a delightful way to engage in festive music-making with a partner. These arrangements are available in various skill levels, from beginner-friendly versions with simple harmonies to more complex duets for advanced pianists. The duet format allows for a collaborative musical experience, enhancing coordination and teamwork. Many free PDF downloads offer flexible arrangements, ensuring that pianists of all ages and abilities can enjoy this classic carol together. Additionally, some versions incorporate dynamic contrasts and rhythmic variations, adding depth and excitement to the performance. Duet arrangements of “We Wish You a Merry Christmas” are a popular choice for holiday gatherings and recitals, fostering joy and camaraderie among pianists.

Advanced Christmas Piano Music

Advanced Christmas piano pieces challenge seasoned pianists with intricate harmonies, complex rhythms, and virtuosic techniques, blending classical sophistication with festive spirit for a captivating performance experience.

Complex Arrangements for Seasoned Musicians

Complex arrangements of Christmas music for piano are designed for advanced pianists, offering intricate harmonies, sophisticated techniques, and nuanced expressions. These pieces often blend classical and jazz elements, creating a rich and layered sound. Seasoned musicians can explore challenging works like virtuosic transcriptions of carols or fusion pieces that push technical boundaries. Such arrangements not only showcase mastery but also bring a fresh, interpretive depth to beloved festive tunes. They provide an opportunity for artistic expression and are perfect for performances that demand both skill and emotional resonance, making them a rewarding challenge for experienced pianists seeking to elevate their repertoire during the holiday season.

Advanced Classical and Jazz Fusion Pieces

Advanced classical and jazz fusion Christmas pieces for piano combine intricate harmonies, complex rhythms, and imaginative interpretations of traditional carols. These arrangements challenge seasoned pianists with sophisticated techniques like improvisation, syncopation, and layered melodies. Jazz-inspired renditions of classics such as ” Silent Night” or “Jingle Bells” introduce unexpected chord progressions and virtuosic flourishes, blending festive cheer with artistic innovation. Meanwhile, classical compositions like Bach’s “Jesu, Joy of Man’s Desiring” are reimagined with jazz influences, creating a unique sonic experience. These pieces are ideal for advanced pianists seeking to showcase their skills and bring a fresh, contemporary vibe to holiday performances, offering both technical challenge and emotional depth.

Challenging Christmas Carols for Solo Piano

For advanced pianists, challenging Christmas carols for solo piano offer a thrilling way to showcase technical prowess and emotional depth. These intricate arrangements often feature complex arpeggios, rapid runs, and harmonically rich chord progressions that breathe new life into beloved holiday tunes. Pieces like “Carol of the Bells” or “O Holy Night” are transformed into virtuosic showpieces, demanding precision and mastery. Additionally, some carols are reimagined with extended techniques, such as pedal effects or polyrhythms, adding layers of sophistication. These demanding works not only highlight the pianist’s skill but also elevate the festive spirit, making them a standout choice for seasoned musicians seeking to impress with their holiday repertoire.

Free Christmas Piano Sheet Music Resources

Discover top websites offering free Christmas piano sheet music PDFs, such as MuseScore, Capotasto Music, and more, perfect for pianists seeking high-quality festive arrangements.

Top Websites for Free PDF Downloads

Several websites offer free Christmas piano sheet music in PDF format, making it easy for pianists to access festive pieces. Capotasto Music provides a wide range of Christmas arrangements, from simple melodies to intricate compositions. MuseScore is another popular platform, offering user-generated and professionally arranged Christmas sheet music for free. Additionally, websites like Piano Song Download and IMSLP.org host extensive libraries of Christmas music, including classical and contemporary pieces. These resources cater to pianists of all skill levels, ensuring everyone can find something to enjoy during the holiday season. Whether you’re a beginner or an advanced player, these sites are invaluable for discovering new music to play.

MuseScore and Other Reliable Platforms

MuseScore stands out as a premier destination for Christmas piano sheet music in PDF format, offering a vast library of user-generated and professionally arranged pieces. This platform allows users to download, print, and play high-quality scores, catering to pianists of all levels. Additionally, MuseScore supports MIDI and MP3 playback, enhancing the learning experience. Other reliable platforms like Capotasto Music and Piano Song Download provide similar services, ensuring access to a diverse range of Christmas compositions. These websites are trusted by musicians worldwide for their accuracy and variety, making them indispensable resources for anyone seeking free Christmas piano music in PDF format during the holiday season.

Capotasto Music ⎯ A Treasure Trove for Pianists

Capotasto Music is a fantastic resource for pianists seeking high-quality Christmas sheet music in PDF format. The platform offers a wide variety of arrangements, from traditional carols like Silent Night and Jingle Bells to contemporary twists on festive classics. With a user-friendly interface, Capotasto Music allows pianists to download and print sheet music effortlessly. The site caters to all skill levels, providing simple melodies for beginners and intricate arrangements for advanced players. Additionally, Capotasto Music often features exclusive compositions and duet arrangements, making it a go-to destination for pianists looking to expand their Christmas repertoire. Its dedication to quality and accessibility ensures a enriching musical experience during the holiday season.

How to Play Christmas Piano Music

Learning to play Christmas piano music involves mastering festive melodies and harmonies. Start with simple carols like Jingle Bells or Silent Night, gradually progressing to more complex pieces. Tutorials and sheet music PDFs provide step-by-step guidance for all skill levels, ensuring a joyful musical experience.

Practice regularly, focusing on rhythm and dynamics. Utilize online resources for tips and arrangements tailored to your proficiency. Embrace the holiday spirit by sharing your music with others, spreading cheer through the universal language of melody.

Step-by-Step Tutorials for Popular Carols

Step-by-step tutorials for popular Christmas carols like Jingle Bells and Silent Night are widely available in PDF format. These guides break down melodies, harmonies, and rhythms into manageable sections, making it easier for pianists of all levels to learn. Many tutorials include finger placement diagrams, tempo adjustments, and practice tips to ensure a smooth learning process. For instance, Jingle Bells tutorials often start with a simple melody, gradually incorporating chords and syncopation for a more dynamic sound. Similarly, Silent Night tutorials focus on creating a serene atmosphere with arpeggios and legato playing. These resources are perfect for beginners and intermediate players aiming to master festive favorites during the holiday season. Additionally, some tutorials offer MIDI or MP3 play-along files to help pianists match their performance to the desired tempo and style.

Learning Tips for Beginners and Intermediate Players

Learning Christmas piano music can be a joyful experience, especially with the right approach. For beginners, starting with simple melodies like Jingle Bells or First Pieces collections is ideal. These pieces often feature straightforward rhythms and familiar tunes, building confidence and technique. Practicing hands separately before combining them is a useful strategy; Intermediate players can explore more complex arrangements, such as duets or contemporary twists on traditional carols. Focusing on dynamics and articulation enhances the festive feel. Utilizing free PDF resources from platforms like MuseScore or Capotasto Music provides a wealth of material tailored to various skill levels. Remember, consistent practice and a focus on expression will bring holiday cheer to your performances.

Mastering Advanced Techniques in Christmas Music

For seasoned pianists, mastering advanced techniques in Christmas music involves exploring intricate arrangements that blend classical elegance with festive flair. Pieces like Bach’s Jesu, Joy of Man’s Desiring or Mozart’s Eine Kleine Nachtmusik offer sophisticated challenges. Advanced techniques such as arpeggio patterns, complex chord progressions, and nuanced pedaling can elevate performances. Jazz-inspired arrangements introduce syncopation and improvisation, adding a modern twist. To refine these skills, focus on precise articulation and dynamic control. Utilizing free PDF resources from platforms like MuseScore or Capotasto Music provides access to challenging yet rewarding sheet music. Practicing advanced pieces slowly before increasing tempo ensures mastery. These techniques allow pianists to deliver captivating renditions of Christmas classics, showcasing both technical prowess and emotional depth.

Benefits of Playing Christmas Music on the Piano

Playing Christmas music on the piano fosters cultural connection, evokes festive emotions, and enhances musical skills, while bringing joy and creating a celebratory atmosphere for all listeners.

Cultural and Emotional Significance

Christmas music for piano holds deep cultural and emotional significance, evoking memories of festive traditions and bringing joy to people worldwide. It bridges generations, connecting families and communities through timeless melodies. The emotional impact of carols like Silent Night and Jingle Bells transcends language and cultural barriers, creating a universal sense of warmth and togetherness. Playing these pieces allows pianists to express their feelings during the holiday season, fostering a sense of belonging and celebration. Whether performed in intimate gatherings or grand concerts, Christmas piano music becomes a powerful medium for sharing love, hope, and cheer, making it a cherished part of holiday traditions for pianists and audiences alike.

Enhancing Musical Skills Through Festive Pieces

Engaging with Christmas piano music PDFs provides an excellent opportunity to enhance musical skills while enjoying festive tunes. These pieces offer a variety of styles, from classical carols to modern jazz arrangements, catering to all skill levels. Beginners can refine their dexterity with simple melodies, while intermediate and advanced pianists can challenge themselves with intricate harmonies and complex techniques. The emotional connection to these familiar songs motivates practice, fostering improvement in rhythm, timing, and expression. Additionally, the structured nature of Christmas music helps develop sight-reading abilities and reinforces musical theory concepts. By incorporating festive pieces into practice routines, pianists can grow their technical proficiency while celebrating the holiday spirit.

Christmas music for piano PDFs offer a joyful way to celebrate the season, providing accessible and festive pieces for pianists of all levels to enjoy and master.

Final Thoughts on Christmas Piano Music PDF

Christmas piano music PDFs offer a versatile and accessible way to celebrate the holiday season through music. These sheet music files cater to pianists of all skill levels, from beginners to advanced players, providing a wide range of styles, from traditional carols to modern arrangements. The convenience of PDF format allows easy downloading, printing, and sharing, making it ideal for both personal practice and festive performances. Additionally, the availability of free resources ensures that everyone can enjoy the magic of Christmas music without cost barriers. Whether you’re looking to enhance your skills or simply spread holiday cheer, Christmas piano PDFs are a delightful and practical choice for musicians of all ages and backgrounds.

sierra reloading manual pdf free download

The Sierra Reloading Manual is a trusted guide for precision shooters, offering detailed reloading data and techniques. It covers various cartridges and powders, ensuring accuracy and safety. The PDF version provides easy access to essential information, making it a valuable resource for both novice and experienced reloaders.

1.1 Overview of the Sierra Reloading Manual

The Sierra Reloading Manual is a comprehensive guide designed for shooters and reloaders, offering detailed information on reloading techniques, ballistic data, and safety protocols. It covers a wide range of cartridges, including popular calibers like .223 Remington and 308 Winchester, with precise load data for accuracy. The manual also includes ballistic charts and trajectory information, making it an invaluable resource for precision shooting. Available in PDF format, it provides easy access to essential reloading data, ensuring convenience for both novice and experienced reloaders. Its focus on safety and optimization makes it a trusted tool for achieving consistent results.

1.2 Importance of Reloading Manuals for Precision Shooting

Reloading manuals, such as the Sierra Reloading Manual, are crucial for precision shooting, providing precise load data and techniques to optimize accuracy. They offer detailed information on bullet weights, powder types, and reloading practices, ensuring consistency and reliability. These manuals help shooters avoid dangerous overloads and underloads, promoting safety. The Sierra Manual, in particular, is valued for its comprehensive data on popular calibers like .223 Remington and 308 Winchester. By following the guidelines, shooters can achieve consistent results, making it an essential tool for both competitive shooters and hunters seeking precise performance.

Key Features of the Sierra Reloading Manual

The Sierra Reloading Manual offers detailed load data for various calibers, safety guidelines, and ballistic charts. It covers popular cartridges like .223 Remington and 308 Winchester, ensuring precision and reliability for reloaders.

2.1 Detailed Load Data for Various Calibers

The Sierra Reloading Manual provides comprehensive load data for numerous calibers, including .223 Remington, .308 Winchester, and 7mm-08 Remington. It lists starting and maximum loads for various bullet weights and types from manufacturers like Sierra, Nosler, Barnes, and Berger. The data is organized by caliber, bullet weight, and powder type, making it easy for reloaders to find the perfect combination for their needs. This detailed information ensures precision, accuracy, and safety, catering to both novice and experienced shooters. The manual’s extensive coverage makes it an indispensable resource for reloading enthusiasts.

2.2 Guidelines for Safe Reloading Practices

The Sierra Reloading Manual emphasizes the importance of safety in reloading. It outlines essential precautions, such as using proper equipment, following load data accurately, and ensuring a clean workspace. The manual also stresses the need to wear protective gear, like safety glasses, and to keep components organized. Detailed instructions guide users on avoiding common hazards, such as overloading or incorrect bullet seating. By adhering to these guidelines, reloaders can minimize risks and achieve consistent, reliable results. Safety is paramount, and the manual provides clear, actionable advice to support it.

2.3 Ballistic Charts and Trajectory Data

The Sierra Reloading Manual includes comprehensive ballistic charts and trajectory data, enabling shooters to predict bullet performance accurately. These charts detail drop, wind deflection, and velocity for various loads and distances. By analyzing this data, shooters can adjust their aim for precise long-range shots. The manual also provides detailed information on bullet expansion and penetration, helping users choose the right load for their specific needs. This data is invaluable for hunters and competitive shooters, ensuring optimal performance and accuracy in the field. The Sierra Manual stands out for its thorough and reliable ballistic information.

Benefits of the Sierra Reloading Manual PDF

The Sierra Reloading Manual PDF offers unmatched convenience, accessibility, and cost-effectiveness. It provides easy access to updated reloading data, ensuring accuracy and safety for reloaders.

3.1 Convenience of Digital Format

The digital format of the Sierra Reloading Manual PDF offers unparalleled convenience. Users can easily access the manual on multiple devices, including smartphones, tablets, and computers. This portability allows reloaders to reference critical data anywhere, whether at home, in the workshop, or at the shooting range. The PDF format ensures that the content is always clear and readable, with zoom functionality for detailed charts and tables. Additionally, digital storage eliminates the risk of losing or damaging a physical copy, making it a reliable and efficient resource for reloaders of all levels.

3.2 Easy Access to Updated Reloading Data

The digital format of the Sierra Reloading Manual ensures easy access to the latest reloading data. Regular updates are seamlessly integrated into the PDF, providing users with the most current information on bullet types, powder recommendations, and optimal loads. This eliminates the need for physical updates or supplementary materials. The manual’s digital nature allows for quick reference to new data, ensuring reloaders stay informed about advancements in reloading techniques and component compatibility. This feature is particularly valuable for those who require precise and up-to-date information to achieve consistent and accurate reloads.

3.3 Cost-Effective Solution for Reloaders

The Sierra Reloading Manual PDF offers a cost-effective solution for reloaders by providing comprehensive data at no additional cost. Free downloads eliminate the expense of purchasing physical copies, making it accessible to all enthusiasts. This affordability ensures that reloaders can invest their resources in quality components and equipment rather than manuals. The PDF format also reduces the need for frequent updates, as new information is readily available online. This makes it an economical choice for those seeking detailed reloading data without compromising on quality or accuracy.

How to Download the Sierra Reloading Manual for Free

Visit reliable platforms like Open Library or official websites, search for the Sierra Reloading Manual, and download the PDF. Ensure secure downloads to avoid malware risks.

4.1 Reliable Platforms for Free PDF Downloads

Several trusted websites offer the Sierra Reloading Manual in PDF format. Open Library and official Sierra Bullets forums provide free access to this resource. Additionally, platforms like GitHub host user-contributed repositories where the manual can be downloaded. Visit these reputable sites to ensure a safe and secure download, avoiding malicious content. Always verify the source and file integrity before downloading to protect your device from potential threats or scams.

4.2 Step-by-Step Guide to Downloading the Manual

Visit a trusted site like Open Library or GitHub. Use the search bar to find “Sierra Reloading Manual PDF.” Select the correct file, ensuring it matches your needs. Click the download link. Save the PDF to your device. If prompted, complete any verification steps. Open the file with Adobe Reader for optimal viewing. Ensure your device has sufficient storage. Avoid unreliable sources to prevent malware. Follow these steps to securely obtain the manual and access essential reloading data. Always prioritize verified sources for a safe and smooth experience.

4.3 Avoiding Scams and Malware When Downloading

When downloading the Sierra Reloading Manual, exercise caution to avoid scams and malware. Avoid suspicious ads or unofficial websites promising free downloads. Verify the source’s credibility and ensure the URL is secure (HTTPS). Never provide personal or payment information, as legitimate manuals are free. Use antivirus software to scan downloaded files. Avoid platforms with excessive pop-ups or unclear download buttons. Stick to trusted sites like Open Library or GitHub. If unsure, download from official Sierra Bullets resources or reputable reloading communities. Prioritizing safety ensures a secure and reliable download experience.

Popular Cartridges Covered in the Manual

The Sierra Reloading Manual includes detailed data for popular cartridges like .223 Remington, 308 Winchester, and 7mm-08 Remington, catering to various shooting preferences and needs.

5.1 .223 Remington Load Data

The Sierra Reloading Manual provides comprehensive load data for the .223 Remington, a highly popular cartridge for both rifles and handguns. The manual includes starting and maximum loads for various bullet weights, from lightweight varmint bullets to heavier match-grade projectiles. Reloaders can find data for bullets ranging from 40gr to 90gr, catering to different shooting applications. The manual also covers a wide range of powders, ensuring optimal performance for accuracy and reliability. With detailed tables and clear instructions, the .223 Remington section is a valuable resource for precision shooters and hunters alike. The PDF format makes it easy to access and print the specific data needed for reloading sessions.

5.2 308 Winchester Reloading Information

The 308 Winchester is a versatile and widely used cartridge, and the Sierra Reloading Manual offers extensive data for it. Reloaders can find detailed information on bullet weights from 150gr to 180gr, suitable for hunting, target shooting, and tactical applications. The manual provides both starting and maximum loads for various powders, ensuring optimal performance. With its comprehensive tables and clear guidelines, the 308 Winchester section is a must-have for those seeking precision and reliability. The PDF format allows easy access, making it a go-to resource for reloaders aiming to achieve consistent results with this popular caliber.

5.3 7mm-08 Remington and Other Popular Calibers

The 7mm-08 Remington is a favorite among hunters and target shooters, and the Sierra Reloading Manual provides extensive data for this caliber. Reloaders can explore various bullet weights, including 120gr, 140gr, and 150gr, with detailed load recipes for optimal performance. Additionally, the manual covers other popular calibers like the 243 Winchester and 6.5 Creedmoor, offering tailored reloading information. This comprehensive coverage ensures that shooters can maximize accuracy and versatility across multiple platforms. The PDF format makes it easy to access and reference these essential reloading details anytime, anywhere.

Sierra vs. Other Reloading Manuals

The Sierra Reloading Manual stands out for its comprehensive data and user-friendly layout. It rivals Nosler and Hornady manuals, offering detailed load recipes and ballistic insights, making it a top choice for reloaders seeking precision and reliability. The free PDF download enhances its accessibility, ensuring shooters can optimize their loads anytime, anywhere.

6.1 Comparison with Nosler and Hornady Manuals

The Sierra Reloading Manual is often compared to Nosler and Hornady manuals, each offering unique strengths. Sierra is praised for its comprehensive load data, including detailed ballistic charts and a wide range of calibers. While Nosler focuses on hunting-specific loads and Hornady emphasizes versatility, Sierra stands out for its precise data tailored to competitive shooters. The free PDF version of Sierra’s manual adds convenience, making it a preferred choice for reloaders seeking accuracy and reliability. This comparison highlights Sierra’s dedication to precision and user accessibility, setting it apart in the reloading community.

6.2 Unique Features of the Sierra Manual

The Sierra Reloading Manual stands out for its comprehensive approach, offering detailed load data, ballistic charts, and reloading tips. Its free PDF version provides unmatched accessibility, allowing shooters to access critical information effortlessly. The manual covers a wide range of calibers, including popular options like .223 Remington and .308 Winchester. Sierra’s commitment to precision is evident in its trajectory data and reloading guidelines, ensuring accuracy for both rifle and handgun enthusiasts. Additionally, the manual’s updated editions reflect the latest advancements in reloading technology, making it a indispensable resource for reloaders seeking reliability and performance.

6.3 User Preferences and Recommendations

Many shooters prefer the Sierra Reloading Manual for its detailed and precise load data, making it a favorite among precision enthusiasts. Users often recommend it for its comprehensive coverage of popular calibers like .223 Remington and .308 Winchester. The free PDF version is particularly praised for its accessibility and convenience. Additionally, reloaders value Sierra’s commitment to updating data, ensuring they have the latest information; While some users compare it favorably to Nosler and Hornady manuals, Sierra’s reputation for accuracy and reliability keeps it a top choice. Exploring forums and communities can provide further insights into maximizing its benefits.

Legal and Safety Considerations

Ensure compliance with local laws and regulations. Always follow safe handling practices and guidelines. Be aware of disclaimers and liability information. Verify data accuracy for safety.

7.1 Understanding Reloading Laws and Regulations

Reloaders must comply with local, state, and federal laws. Licensing requirements and age restrictions apply. Familiarize yourself with regulations regarding component purchases and storage. Ensure all activities align with legal standards. The Sierra Reloading Manual emphasizes adhering to safety and legal guidelines to avoid liability. Proper documentation and understanding of restrictions are crucial. Always verify legal requirements before starting any reloading project to ensure compliance and safety.

7.2 Safety Precautions When Using the Manual

Always follow safety guidelines when using the Sierra Reloading Manual. Wear protective gear, including safety glasses and gloves. Ensure proper ventilation to avoid inhaling hazardous materials. Double-check load data to prevent over-charging, which can lead to catastrophic failures. Use only recommended tools and equipment. Never deviate from the manual’s instructions without expert verification. Keep the workspace clean and organized to minimize accidents. Regularly inspect equipment for wear or damage. Prioritize safety to avoid injuries and ensure reliable reloads. The manual emphasizes these precautions to protect users and maintain precision in reloading processes.

7.3 Disclaimer and Liability Information

The Sierra Reloading Manual is provided for informational purposes only. Sierra Bullets disclaims any liability for damages or injuries resulting from improper use of the data. Users must adhere to safe reloading practices and verify all load data before use. The manual is intended for experienced reloaders, and Sierra Bullets cannot be held responsible for errors or misuse. Always follow local laws and regulations. By using this manual, users acknowledge they understand and accept these terms. Reloading carries inherent risks, and users must exercise caution to avoid accidents. Proper training and equipment are essential for safe reloading practices.

Digital Tools and Resources

The Sierra Reloading Manual app offers digital load data, ballistic calculators, and a user-friendly interface for precise reloading. Available for iOS and Android, it enhances reloading efficiency and accuracy.

8.1 Reloading Apps Compatible with Sierra Data

Several reloading apps are designed to work seamlessly with Sierra data, offering features like load customization and ballistic calculations. These apps, available for both iOS and Android, provide reloaders with a convenient way to access and manage their reloading data digitally. They often include libraries of Sierra’s load data, allowing users to create, edit, and organize their own reload recipes. Additionally, some apps offer real-time updates, ensuring users have the latest information at their fingertips, which is especially useful for those who frequently experiment with new cartridges and powders. This integration enhances the reloading process, making it more efficient and precise for enthusiasts.

8.2 Ballistic Calculators for Precision Shooting

Ballistic calculators are essential tools for precision shooting, offering detailed trajectory predictions and wind deflection calculations. Many modern calculators are compatible with Sierra reloading data, allowing shooters to input specific bullet profiles and environmental conditions. These tools often include features like trajectory plotting, ballistic coefficient calculations, and range estimation. By integrating Sierra’s reload data, shooters can optimize their loads for maximum accuracy. Some calculators are standalone software, while others are integrated into reloading apps, providing a seamless experience for those using the Sierra Reloading Manual PDF. This combination enhances shooting performance and ensures precise results in the field.

8.3 Online Communities for Reloading Enthusiasts

Online communities dedicated to reloading enthusiasts provide valuable platforms for sharing knowledge, troubleshooting, and collaborating. Forums like Reddit’s r/Reloading and specialized reloading websites allow users to discuss techniques, share load data, and learn from experienced shooters. These communities often feature threads dedicated to the Sierra Reloading Manual, where members can exchange tips and insights; They also serve as hubs for staying updated on new products, techniques, and safety practices. Engaging with these communities can enhance your reloading experience and help you optimize your results with the Sierra manual.

Troubleshooting Common Reloading Issues

Troubleshooting common reloading issues involves identifying load errors and resolving PDF viewing problems. Ensure accurate reloads by optimizing techniques and following Sierra’s guidelines for precise results.

9.1 Identifying and Correcting Load Errors

Identifying and correcting load errors is crucial for ensuring accuracy and safety. Common issues include incorrect powder charges, inconsistent bullet seating, and improper primer alignment. The Sierra Reloading Manual provides detailed guidelines to diagnose and fix these errors. Refer to ballistic charts for optimal load configurations and adjust as needed. Always double-check measurements and follow safety protocols to avoid dangerous misloads. Correcting errors promptly ensures reliable performance and precision in your reloads. The manual emphasizes the importance of meticulous attention to detail to achieve consistent results. Use the Sierra data as a trusted reference for troubleshooting and refining your reloading process.

9.2 Resolving PDF Viewing Issues

When encountering PDF viewing issues with the Sierra Reloading Manual, ensure your PDF reader is updated. Save the file to your computer and open it with Adobe Reader for optimal functionality. If load data appears blacked out, enable JavaScript in Adobe Reader settings. Some manuals require Adobe Acrobat for full interactivity. If issues persist, check for corrupted downloads or incomplete files. Visit the official Sierra Bullets website for troubleshooting guides or contact their support team for assistance. Resolving these issues ensures uninterrupted access to critical reloading data for precise and safe reloading practices.

9.3 Optimizing Reloads for Accuracy

Optimizing reloads for accuracy begins with consulting the Sierra Reloading Manual’s load charts to find ideal charges for your specific bullet weight and type. Experiment with different powders and seating depths to maximize precision. Ensure consistency in primer and case selection, as variance can affect accuracy. Use ballistic calculators to predict trajectories and adjust loads accordingly. Regularly clean and maintain your reloading equipment to ensure precise measurements. Document every load and its performance to refine your techniques over time. By following these steps, you can achieve consistent and accurate reloads tailored to your firearm and shooting style.

The Sierra Reloading Manual is an indispensable resource for shooters, offering precise data and safety guidelines. Its digital format ensures convenience and accessibility, empowering reloaders to refine their craft and achieve optimal accuracy. By following the manual’s instructions and staying updated, enthusiasts can enhance their shooting experience and explore new possibilities in reloading.

10.1 Summary of Key Takeaways

The Sierra Reloading Manual is a comprehensive guide offering detailed reloading data, safety protocols, and ballistic insights. It covers popular calibers like .223 Remington and 308 Winchester, providing precise load recommendations. The manual emphasizes safe practices and includes troubleshooting tips for common issues. Its digital format ensures easy access and updates, making it a valuable tool for both novice and experienced reloaders. By adhering to the manual’s guidelines, shooters can optimize their reloads for accuracy and performance. This resource is essential for anyone seeking to master reloading and enhance their shooting capabilities effectively.

10.2 Encouragement to Explore and Practice

The Sierra Reloading Manual encourages shooters to explore and refine their skills through hands-on practice. With its comprehensive data and guidelines, the manual empowers reloaders to experiment confidently. By following the detailed instructions, enthusiasts can optimize their reloads for precision and performance. The PDF format allows easy access to updated information, fostering continuous learning. Encourage yourself to engage with online communities, share experiences, and refine techniques. Practice is key to mastering reloading, and the Sierra Manual serves as an invaluable companion on this journey, helping you achieve consistent and accurate results with every shot.

10.3 Staying Updated with New Reloading Data

Staying updated with the latest reloading data is crucial for safety and precision. The Sierra Reloading Manual PDF ensures access to the most current information, as updates are regularly released. Users can download new versions or supplements from trusted platforms like Open Library or official Sierra websites. Regularly checking for updates ensures you have the latest load data, bullet types, and powders. This practice not only enhances accuracy but also keeps you informed about safety guidelines and emerging trends in reloading. Bookmark reliable sources and join online forums to stay informed and make the most of your reloading journey.

plantar fasciitis taping pdf

Plantar fasciitis taping is a popular, non-invasive method to alleviate pain and support the foot. Techniques like Low-Dye and Kinesio taping redistribute pressure, reducing strain on the plantar fascia for therapeutic relief.

1.1 Definition and Purpose of Plantar Fasciitis Taping

Plantar fasciitis taping involves applying specialized tape to support the foot’s arch and plantar fascia. Its primary purpose is to reduce pain, inflammation, and strain on the fascia. By redistributing pressure, taping helps alleviate discomfort and enhances mobility. Techniques like Low-Dye and Kinesio taping are commonly used to stabilize the foot and promote healing. This method is non-invasive and often combined with other therapies to manage symptoms effectively, making it a popular choice for both athletes and individuals with chronic foot pain.

1.2 Overview of Plantar Fasciitis and Its Symptoms

Plantar fasciitis is a common condition causing pain and inflammation in the plantar fascia, the tissue supporting the arch of the foot. Symptoms include sharp heel pain, tenderness, and stiffness, often worse after rest. Pain may radiate along the bottom of the foot and worsen with activity. It frequently affects individuals with flat feet, high arches, or those who engage in repetitive stress activities like running. If untreated, it can lead to chronic discomfort and mobility issues, impacting daily activities and quality of life.

1.3 Importance of Taping in Managing Plantar Fasciitis

Taping is a crucial technique in managing plantar fasciitis, offering immediate pain relief and support. By redistributing pressure and stabilizing the foot, it reduces strain on the plantar fascia, promoting healing. Taping is non-invasive, cost-effective, and allows patients to remain active during treatment. It is particularly beneficial for providing arch support and addressing discomfort during daily activities, making it a popular adjunct to other therapies like orthotics and stretching exercises.

Benefits of Plantar Fasciitis Taping

Plantar fasciitis taping provides pain relief, reduces inflammation, and offers stability to the foot. It enhances mobility and flexibility, allowing patients to maintain activity levels during recovery.

2.1 Pain Relief and Reduced Inflammation

Plantar fasciitis taping offers immediate pain relief by redistributing pressure and reducing stress on the plantar fascia. Techniques like Low-Dye taping and Kinesio taping help minimize inflammation, promoting faster recovery. This method supports the foot, allowing the fascia to heal while maintaining mobility. By off-loading tension, taping reduces discomfort during daily activities and exercise, making it a valuable conservative treatment option for managing symptoms effectively.

2.2 Support and Stability for the Plantar Fascia

Plantar fasciitis taping provides essential support and stability to the plantar fascia, reducing strain during physical activities. Techniques like Low-Dye and Kinesio taping offer structural reinforcement, minimizing fascial stress. By redistributing pressure, taping helps maintain proper foot mechanics, preventing excessive stretching of the fascia. This support is particularly beneficial for individuals with chronic plantar fascia issues, enhancing their ability to perform daily tasks and exercises without discomfort or further injury.

2.3 Enhancing Mobility and Flexibility

Plantar fasciitis taping enhances mobility by reducing stiffness and promoting a natural range of motion. The tape’s supportive properties allow the foot to move more freely, easing tightness. It also improves flexibility by gently encouraging the plantar fascia to stretch without strain. This dual benefit makes taping a valuable tool for restoring functional movement and reducing discomfort, especially during activities like walking or running. Over time, consistent use can lead to improved long-term mobility and flexibility in the affected foot.

Common Taping Techniques for Plantar Fasciitis

Several effective taping methods exist, each offering unique benefits. Low-Dye, Kinesio, and cross-strapping techniques are widely used to provide support and therapeutic relief for plantar fasciitis.

3.1 Low-Dye Taping Technique

The Low-Dye taping technique is a widely recognized method for managing plantar fasciitis. It involves applying adhesive tape strips across the arch and heel to redistribute pressure and reduce strain. Starting from the heel, tape is placed along the plantar fascia, often with moderate tension, to support the foot’s natural alignment. This technique is particularly effective for short-term pain relief and is frequently recommended in clinical settings. Studies highlight its efficacy in alleviating symptoms and improving mobility, making it a popular choice among physical therapists and patients alike.

3.2 Kinesio Taping (KT Tape) Method

Kinesio Taping, or KT Tape, offers a flexible approach to managing plantar fasciitis. Unlike traditional taping, KT Tape allows for joint movement while providing support. Applied with minimal tension, it gently lifts the skin, enhancing blood flow and reducing inflammation. Techniques involve placing strips across the arch, around the heel, and along the plantar fascia. Research suggests KT Tape can improve balance and functional performance, making it a preferred option for active individuals seeking a dynamic treatment solution.

3.3 Calcaneal Taping Technique

The Calcaneal Taping Technique focuses on stabilizing the heel to reduce plantar fascia strain. Tape is applied around the calcaneus, creating a supportive wrap. This method helps alleviate heel pain by limiting excessive pronation and providing structural support. It is often used in conjunction with other taping techniques for enhanced effectiveness. The technique is particularly beneficial for individuals with severe heel pain, offering immediate relief and stability during daily activities or sports.

3.4 Cross-Strapping Technique

The Cross-Strapping Technique involves applying multiple strips of tape across the arch and heel in a crisscross pattern. This method provides additional support and stability to the plantar fascia, reducing stress and pain. The tape is applied with mild tension to ensure proper distribution of pressure. This technique is particularly effective for individuals with severe plantar fasciitis, as it offers enhanced structural support and helps alleviate discomfort during physical activities. It is often combined with other taping methods for optimal results.

Step-by-Step Application Guide

A comprehensive guide outlining preparation, tape placement, and securing techniques to effectively manage plantar fasciitis symptoms through proper taping methods.

4.1 Preparing the Foot for Taping

Proper preparation ensures effective taping. Wash and dry the foot thoroughly to remove oils or lotions. Trim toenails to avoid pressure points. Gently exfoliate calloused areas if necessary. Apply a thin layer of talcum powder to prevent moisture buildup. Ensure the skin is dry and free of lotions, as this enhances tape adhesion. These steps create an optimal surface for taping, minimizing irritation and maximizing support for the plantar fascia.

4.2 Applying the Tape Across the Arch

Place the tape along the arch, starting from the heel and extending to the ball of the foot. Apply gentle, consistent pressure with 50-75% stretch to avoid discomfort. Ensure the tape is smooth and wrinkle-free to prevent irritation. This technique provides support and reduces strain on the plantar fascia, promoting healing and alleviating pain during daily activities. Proper application ensures optimal relief without restricting natural foot movement. Smooth the tape firmly to secure adhesion and enhance comfort.

4.3 Securing the Tape at the Heel and Ball of the Foot

To secure the tape effectively, anchor one end at the heel and wrap it firmly around the back of the foot. Extend the tape to the ball of the foot, ensuring a smooth transition. Apply gentle pressure to avoid discomfort while maintaining enough tension to hold the tape in place. Finish by pressing the tape firmly at the edges to prevent shifting. Proper securing ensures consistent support and prevents the tape from loosening during movement, enhancing the therapeutic benefits for plantar fasciitis relief.

4.4 Finishing the Taping Process

Once the tape is applied, smooth it out to ensure proper adhesion. Apply the final piece of tape without stretch at the ball of the foot, securing it firmly. Trim any excess tape for a neat finish. Press the edges of the tape gently to prevent peeling. Ensure the tape is snug but not overly tight, allowing for natural foot movement. Finish by inspecting the tape to confirm it is evenly applied and free of wrinkles, ensuring optimal support and comfort throughout the day.

Scientific Evidence and Studies

Research supports Low-Dye and Kinesio taping for plantar fasciitis, showing reduced pain and improved function. Studies highlight their short-term benefits, though more research is needed for long-term effects.

5.1 Effectiveness of Low-Dye Taping

Low-Dye taping effectively reduces plantar fascia strain, offering immediate pain relief. Studies show it decreases heel pain and improves function, with benefits lasting up to 24 hours post-application.

5.2 Research on Kinesio Taping for Plantar Fasciitis

Research indicates Kinesio taping helps reduce pain and improve symptoms in plantar fasciitis. Studies show it enhances mobility and functional outcomes, making it a popular choice for athletes and therapists. However, further investigation is needed to establish long-term benefits and optimal application techniques.

5.3 Comparative Studies of Different Taping Techniques

Comparative studies reveal varying effectiveness of taping techniques for plantar fasciitis. Low-Dye taping is often highlighted for its ability to off-load the plantar fascia, while Kinesio taping shows promise in improving mobility. Calcaneal taping focuses on heel support, reducing pain during activities. Research suggests that each technique offers unique benefits, but more studies are needed to determine long-term efficacy and optimal application methods for different patient needs.

Combining Taping with Other Treatments

Combining taping with orthotics, stretching exercises, and ice therapy enhances pain relief and supports the plantar fascia. This multi-faceted approach promotes healing and improves mobility effectively.

6.1 Orthotics and Arch Support

Orthotics and arch supports are essential in managing plantar fasciitis. They redistribute pressure, providing structural stability to the foot. Custom or over-the-counter inserts can correct biomechanical issues, alleviate strain on the plantar fascia, and complement taping techniques. By addressing foot alignment and weight distribution, orthotics help reduce inflammation and prevent further injury, making them a cornerstone in comprehensive treatment plans alongside taping methods.

6.2 Stretching Exercises and Physical Therapy

Stretching exercises and physical therapy are crucial for managing plantar fasciitis. Targeting the plantar fascia, Achilles tendon, and calf muscles helps reduce tightness and improve flexibility. Techniques include calf stretches, toe stretches, and heel raises. Physical therapy may involve resistance exercises, foam rolling, and manual therapy to enhance mobility. Regular stretching, combined with taping, can alleviate pain, promote healing, and restore functional movement. Consistent practice, often 2-3 times daily, is recommended for optimal results and long-term relief.

6.3 Ice Therapy and Anti-Inflammatory Medications

Ice therapy helps reduce inflammation and numb pain in the plantar fascia. Applying ice packs or ice wraps for 15-20 minutes several times a day can provide immediate relief. Anti-inflammatory medications, such as ibuprofen or naproxen, can further decrease swelling and pain. These methods are often used alongside taping to enhance comfort and promote healing. Always consult a healthcare provider before starting medication to ensure safe and appropriate use. Combined with taping, these treatments can significantly improve recovery outcomes.

Tips for Optimal Taping Results

Use high-quality tape, apply smoothly without wrinkles, and ensure proper tension for maximum support. Clean and dry the skin before taping to enhance adhesion and comfort.

7.1 Choosing the Right Type of Tape

Choosing the right tape is crucial for effective plantar fasciitis management. Opt for breathable, hypoallergenic tapes to minimize skin irritation. Kinesio tape is ideal for flexibility, while athletic tape provides firmer support. Ensure the tape is designed for foot use, as it withstands friction and moisture better. Avoid very stiff tapes that may restrict movement. Proper adhesion is key for longevity and comfort during daily activities.

7.2 Maintaining Proper Foot Hygiene

Proper foot hygiene is essential for effective taping and preventing complications. Wash and dry your feet thoroughly before applying tape to ensure proper adhesion and reduce infection risks. Trim toenails and avoid lotions or powders, as they can interfere with tape sticking. Clean skin promotes better tape adherence and minimizes irritation. Regularly inspect and clean the taped area to maintain hygiene and comfort. This routine supports the healing process and ensures the tape remains effective throughout the day.

7.3 Avoiding Over-Tightening the Tape

Avoiding over-tightening the tape is crucial to prevent discomfort, numbness, or restricted blood flow. Apply the tape with gentle pressure, ensuring it provides support without constriction. Overly tight tape can lead to poor circulation and reduced mobility, undermining its therapeutic benefits. After application, check the tightness by pinching the skin slightly; it should not feel overly restrictive. Proper tension ensures comfort and effectiveness, allowing the tape to function as intended without causing additional issues.

Common Mistakes to Avoid

Common mistakes include applying tape too tightly, placing it incorrectly, and failing to allow skin to breathe, which can cause discomfort or skin irritation.

8.1 Incorrect Tension Application

Incorrect tension is a common mistake when applying tape for plantar fasciitis. Applying the tape too tightly can cause discomfort, numbness, or restricted movement, while too little tension may fail to provide adequate support. Proper tension ensures the tape stays in place without cutting off circulation or causing pain. It’s essential to follow guidelines, such as applying 50-75% of the tape’s maximum stretch, to achieve the right balance and avoid complications.

8.2 Improper Placement of the Tape

Improper placement of the tape is a frequent error that can reduce its effectiveness. If the tape is applied to the wrong areas or at incorrect angles, it may fail to provide adequate support or could even increase pressure on sensitive regions. Proper placement requires careful attention to the arch and heel alignment. Following specific taping guidelines is crucial to ensure the tape addresses the plantar fascia effectively and avoids exacerbating discomfort or misalignment.

8.3 Not Allowing Skin to Breathe

Not allowing the skin to breathe is a common mistake when applying tape for plantar fasciitis. Tight or excessive taping can trap moisture, leading to skin irritation, rashes, or even fungal infections. Proper taping techniques should allow for airflow and avoid covering unnecessary areas. Removing the tape periodically and ensuring the skin is clean and dry before reapplying can help prevent these issues and maintain the effectiveness of the taping method.

Contraindications and Precautions

Taping is not advised for individuals with open wounds, skin infections, or circulatory issues. Allergic reactions to adhesives and sensitive skin conditions may also contraindicate its use.

9.1 Allergic Reactions to Adhesives

Allergic reactions to the adhesives used in taping can occur, causing skin irritation, redness, or rashes. Individuals with sensitive skin or a history of adhesive allergies should perform a patch test before applying the tape. Severe reactions may require discontinuing taping altogether. It is essential to use hypoallergenic tapes or consult a healthcare professional for alternative solutions to avoid complications and ensure safe application.

9.2 Open Wounds or Skin Infections

Taping over open wounds or skin infections can exacerbate conditions and impede healing. Applying tape to broken or inflamed skin increases the risk of infection and may cause further irritation. It is crucial to avoid taping until the wound has fully healed or the infection is resolved. Consulting a healthcare provider before resuming taping ensures proper wound care and prevents potential complications, promoting a safe and effective recovery process.

9.3 Circulatory Issues

Circulatory issues, such as poor blood flow or swelling, can be worsened by taping. Tight tape may restrict circulation, leading to discomfort or complications. Individuals with circulatory problems should exercise caution and consult a healthcare professional before applying tape. Proper taping techniques that avoid excessive pressure are essential to maintain blood flow and ensure safe, effective support for the plantar fascia without compromising vascular health.

Patient Testimonials and Success Stories

Many patients report significant pain relief and improved mobility after using plantar fasciitis taping. Positive outcomes highlight its effectiveness in managing symptoms and enhancing daily activities.

10.1 Positive Outcomes from Low-Dye Taping

Patients often report significant pain reduction and improved mobility after applying Low-Dye taping. This technique effectively redistributes pressure, providing immediate relief and support. Many find it helpful for daily activities and exercise, with consistent use leading to better long-term outcomes. The simplicity and non-invasive nature of Low-Dye taping make it a popular choice among those seeking quick symptom alleviation without resorting to more aggressive treatments.

10.2 Experiences with Kinesio Taping

Many patients report positive experiences with Kinesio taping, citing reduced pain and improved mobility. The elastic properties of the tape allow for a full range of motion while providing support. Some users highlight its effectiveness in enhancing balance and reducing inflammation. Kinesio taping is particularly praised for its comfort and durability, making it a preferred option for active individuals. Overall, it offers a gentle yet effective solution for managing plantar fasciitis symptoms, with many experiencing long-term benefits when combined with other therapies.

10.3 Long-Term Benefits Reported by Patients

Patients often report long-term benefits from consistent taping, including reduced recurrence of symptoms and improved foot stability. Kinesio taping, in particular, has shown to promote lasting relief by enhancing fascial mobility and reducing chronic inflammation. Many individuals experience sustained pain reduction and improved mobility, allowing for greater participation in daily activities and sports. Over time, these benefits contribute to better overall foot health and a decreased need for additional treatments, making taping a valuable long-term management strategy for plantar fasciitis.

Plantar fasciitis taping is a proven, effective method for pain relief and improved mobility. Consistent use, combined with therapy, supports lasting recovery and optimal foot health.

11.1 Summary of Taping Benefits

Taping techniques for plantar fasciitis provide immediate relief by redistributing pressure and offering structural support. Methods like Low-Dye and Kinesio taping are non-invasive, enhancing mobility and reducing pain. They are often used alongside orthotics and stretching for optimal results. Studies show these techniques effectively alleviate symptoms, especially in the short term. Consistent application, as per professional guidance, can significantly improve comfort and function for individuals with plantar fasciitis.

11.2 Encouragement for Consistent Application

Consistent taping application is crucial for managing plantar fasciitis symptoms effectively. Regular use helps maintain support and reduces recurring pain. Patients often report improved function and comfort with daily taping. It’s essential to follow proper techniques and adjust as needed. Over time, consistent application can lead to long-term relief, making it a valuable part of a comprehensive treatment plan for those suffering from plantar fasciitis.

11.3 Importance of Combining with Other Therapies

Combining taping with other therapies enhances treatment outcomes for plantar fasciitis. Orthotics and arch supports provide structural stability, while stretching and physical therapy improve mobility. Ice therapy and anti-inflammatory medications reduce swelling and pain. A holistic approach addresses both symptoms and root causes, promoting faster recovery. Consistency in combining these methods ensures better long-term results and prevents relapse, making it a cornerstone of effective plantar fasciitis management.

Additional Resources

Access detailed PDF guides, instructional videos, and expert tutorials for plantar fasciitis taping. Professional consultations with physical therapists or podiatrists can also provide personalized guidance and support.

12.1 Recommended Reading and PDF Guides

Key studies by Saxelby and Betts on Low-Dye taping are essential reading. PDF guides like “Plantar Fasciitis Taping Techniques” and “Kinesio Taping for Foot Pain” offer step-by-step instructions. Research articles from The Foot and International Journal of Foot and Ankle provide evidence-based insights. Downloadable resources, such as the “Low-Dye Taping Manual” and “KT Tape Pro Instructions,” are highly recommended for practical applications. These materials ensure a comprehensive understanding of taping methods and their benefits for managing plantar fasciitis effectively;

12.2 Suggested Videos and Tutorials

YouTube offers excellent video guides on plantar fasciitis taping, such as “KT Tape Pro: Plantar Fasciitis” and “Low-Dye Taping Technique.” Tutorials by physical therapists demonstrate step-by-step methods. Sports taping channels provide clear instructions for arch support and heel stabilization. Additionally, websites like FootAnkle and KTTape offer downloadable PDF guides with visual aids. These resources are ideal for patients and practitioners seeking practical, visual instruction on effective taping techniques for managing plantar fasciitis.

12.3 Professional Consultation Recommendations

Consulting a podiatrist or physical therapist is crucial for personalized taping strategies. Professionals can assess foot structure and pain points, ensuring optimal tape application. They often combine taping with orthotics, stretching, or ice therapy for better outcomes. Studies by АП Середа and ЕВ Костенко highlight the importance of expert guidance for effective plantar fasciitis management. Seeking professional advice ensures a tailored approach, addressing underlying issues and promoting long-term relief from symptoms.